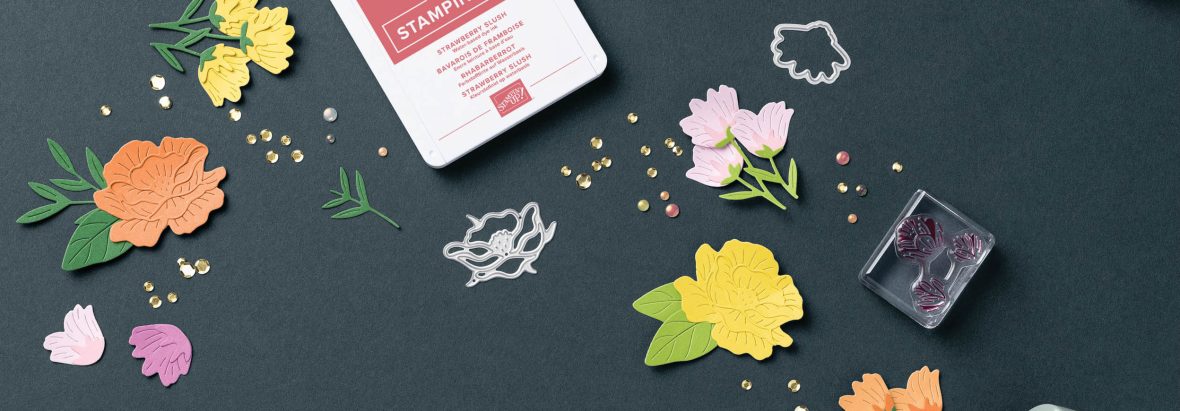
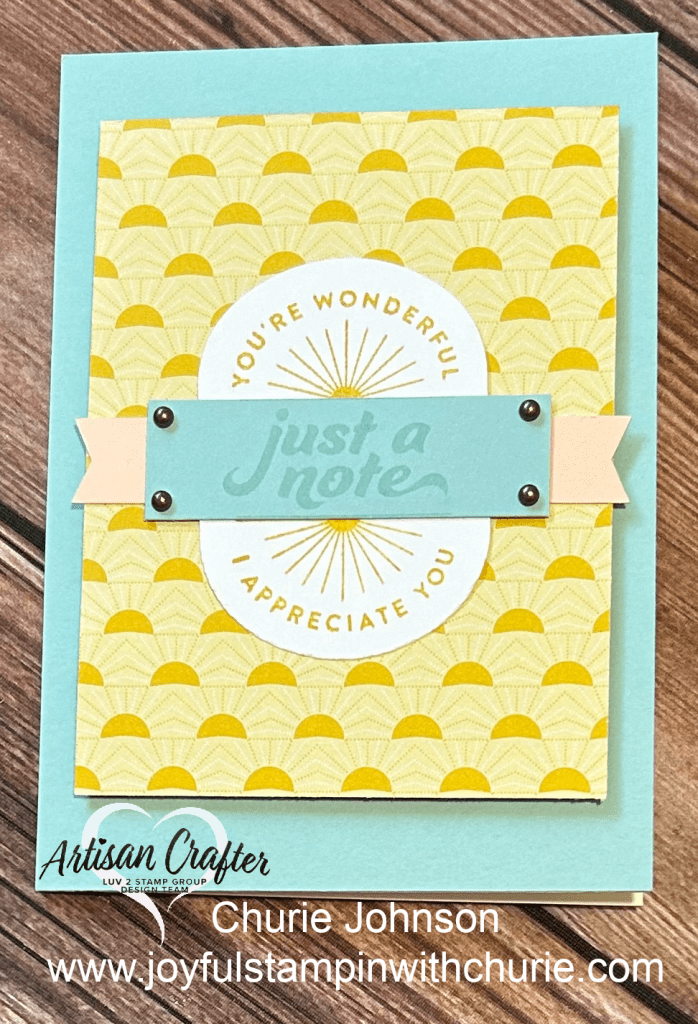
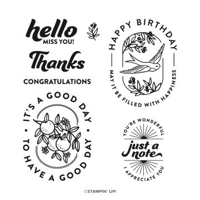
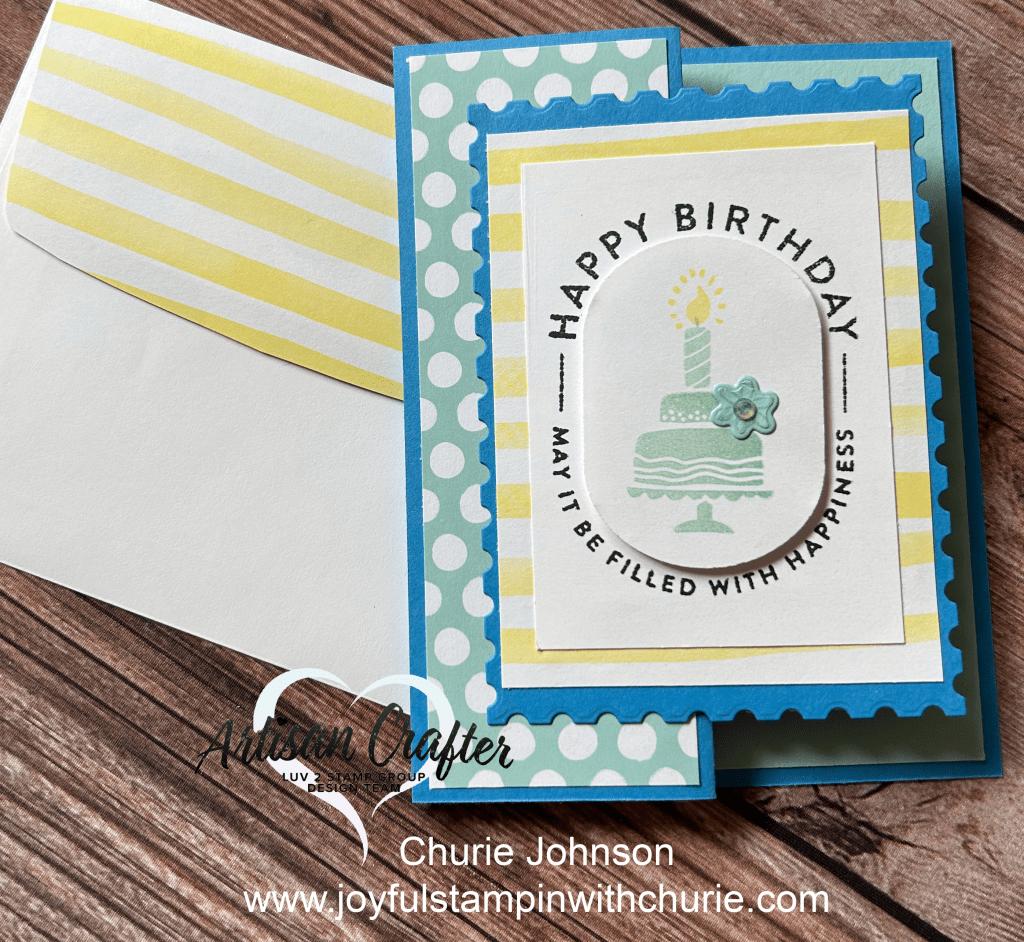
I just love how easy it is to create quick wonderful cards with the Stampin’ Up Filled With Happiness stamp set. For this card I used the Stampin’ Up Notes and Envelopes.
I used the following color combination for this card:
For this card I wanted to demonstrate how you can create a project using the Stampin’ Up Filled With Happiness stamp set without the Modern Oval punch.
When I received the Stampin’ Up Filled With Happiness stamp set and Modern Oval punch in the mail, I could not wait to create a card with them. I paired those projects with the Hooray For Surprises bundle to make this card.
Card base: 5.5″ x 8.5″ (scored at 2 1/8″ and 4 1/4″)
The Pool Party Polka Dot layer: 1 7/8″ x 5 3/8″
Azure Afternoon: Perennial Postage Dies
Lemon Lolly Striped DSP (front of card): 4″ x 3″
White cardstock: 3 1/2″ x 2 1/2″
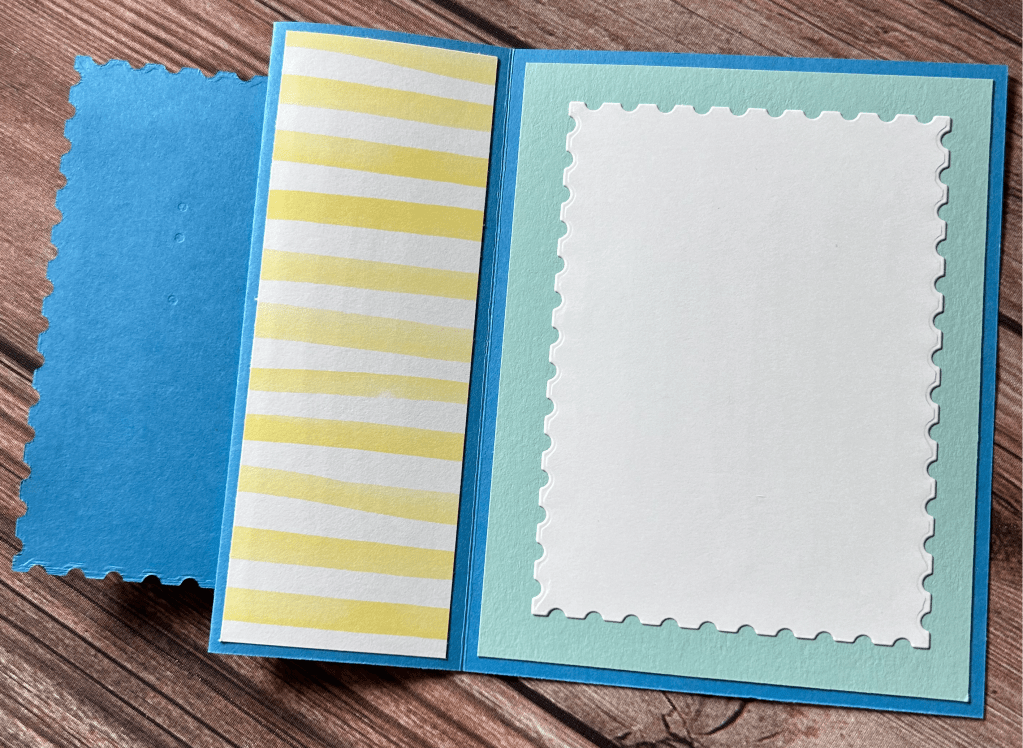
Lemon Lolly Striped DSP (inside of card): 1 7/8″ x 5 3/8″
Pool Party layer (inside of card): 5 1/4″ x 4″
White Cardstock (inside of card): Perennial Postage Dies
Instructions: Stamp the Happy Birthday – May it be filled with happiness image onto a Basic White 3 1/2″ x 2 1/2″ piece of cardstock in Black Memento ink. Next, stamp the cake and candle images from the Hooray For Surprises bundle in Pool Party and the candle flame in Lemon Lolly on Basic White cardstock and use the Modern Oval punch to punch the oval shape out. Use Stampin’ dimensionals to adhere the Cake with candle image oval punched piece over the bird stamped image. I then stamped the flower image from the Hooray For Surprises bundle in Pool Party ink on Pool Party cardstock and die cut the image out using the coordinating dies. Lastly, you will assemble all the pieces together to make the card. Please note I used Tear and Tape adhesive (a stronger adhesive) on the Azure Afternoon Postage piece when I adhered it to the front of the card.
The supplies I used to create this cute birthday card is below. Happy stamping! 🙂
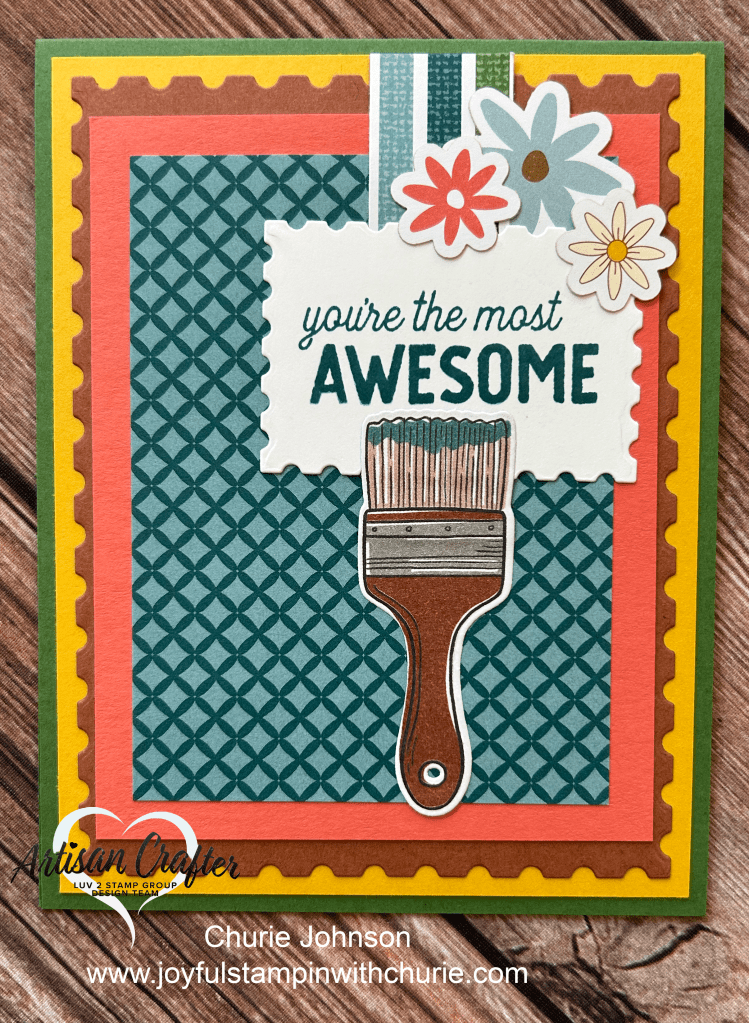
Who doesn’t love adding a little creativity to their projects? I wanted to be creative with the Stampin’ Up Trusty Tools bundle, Trusty Toolbox 12″ x 12″ Designer Series Paper (DSP), Sweet Thoughts Memories and More Card Pack, and the Perennial Postage dies.
Instructions: The paint brush was die cut from the Trusty Toolbox DSP using the Trusty Tools dies. The sentiment was stamped in Pretty Peacock ink on the Basic White cardstock Postage Stamp die cut piece. The flowers are from the Sweet Thoughts and Memories Card Pack. The three paint lines came from one of the cards in the Sweet Thoughts and Memories Card Pack.
Below is a list of Stampin’ Up products I used to create this card. Happy stamping! 🙂
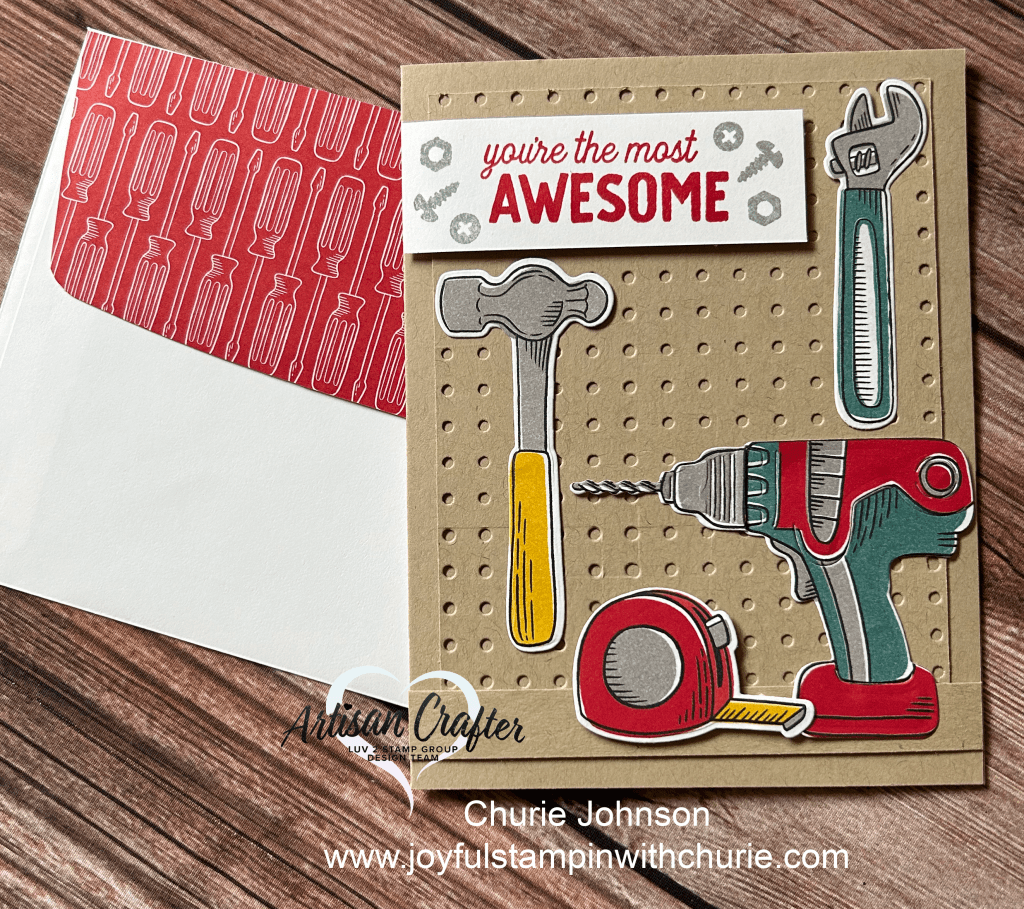
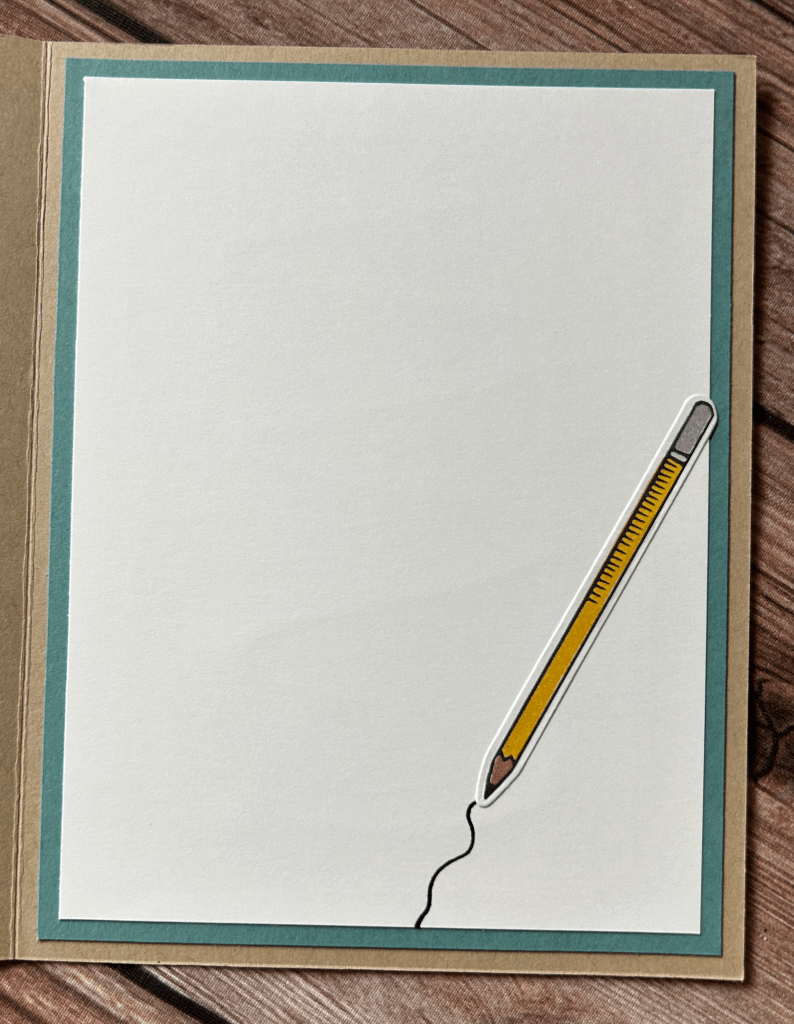
Creating projects with the Stampin’ Up Trusty Tools bundle is so much fun. I used the Trusty Tools dies to die cut all of the tools from the Trusty Toolbox Designer Series Paper (DSP). I just love how Stampin’ Up creates coordinating products and when some of the dies will cut out images from the DSP.
Want to add a little fun to your card? Just use a black Stampin’ Write Marker to draw a line from the pencil. The pencil was die cut from the Trusty Toolbox DSP.
Today I paired the Sweetest Cherries stamp set and Cherry Builder punch with the Sunny Days Designer Series Paper (DSP) which is a Stampin’ Up Sale-A-Bration item you can earn with a qualifying Stampin’ Up purchase.
To create this card, I stamped the sentiment from the Sweetest Cherries stamp set on Basic White cardstock and then fussy cut them using scissors. Next, I die cut one Shaded Spruce circle and one Basic White circle using the Stylish Shape dies. On the Basic White circle I stamped the cherry image in Poppy Parade ink, the stem in Black ink, and the leaves in Shaded Spruce. I wanted to give my card some dimension so I decided to stamp and punch out another cherry using the same colors as before and used Stampin’ Dimensionals to adhere it to the card.
Card Measurements:
Card base: 11″ x 4.25″ (scored at 5.5″)
Shaded Spruce layer: 4″ x 4.25″
Sunny Days DSP layer: 3.5″ x 4.25″
The Stampin’ Up supplies I used to make this project is below. Happy stamping! 🙂
Today I wanted to highlight two of the Sale-A-Bration products that a person can earn with a qualifying Stampin’ Up order: Sunny Days 12″ x 12″ Designer Series Paper (DSP) and Heartfelt Hellos stamp set that coordinates with the Heartfelt Hexagon punch.
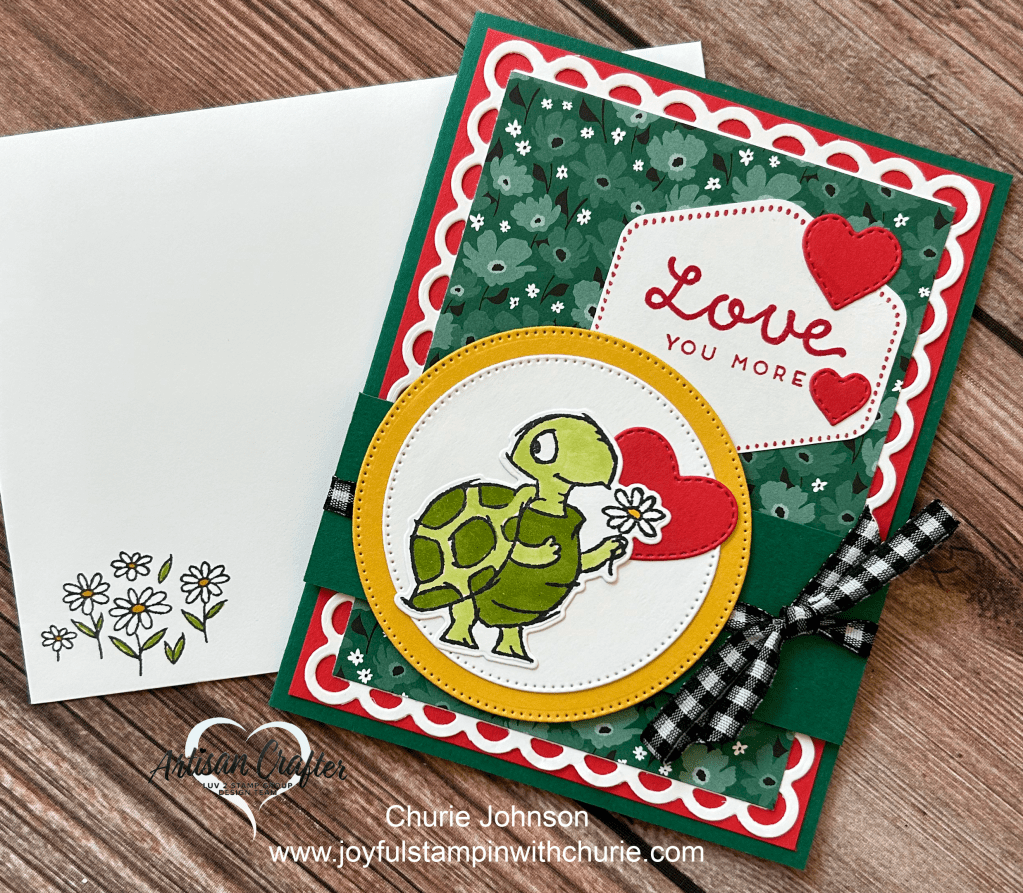
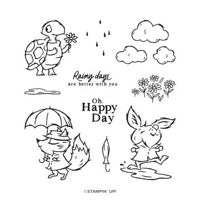
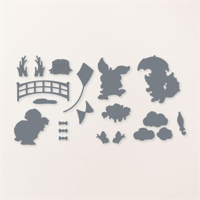
This card was a lot of fun to make. I mixed and matched a lot of Stampin’ Up products. The Shaded Spruce card base is 5.5″ x 8.5″ (scored at 4.25″). The Poppy Parade layer is 5.25″ x 4″. Next, I die cut a scalloped rectangle using the Scalloped Contour die set. The Sunny Days DSP layer is 4.75″ x 3.5″. The Shaded Spruce strip is 1.5″ x 4.25″. The Love You More Sentiment from the Heartfelt Hellos stamp set was stamped on Basic White cardstock in Poppy Parade ink, the border was stamped in Poppy Parade ink using the image from the Stampin’ Up Heartfelt Hexagon stamp set, and then it was punched out using the Heartfelt Hexagon punch. The Crushed Curry and Basic White circles were die cut using the Stylish Shapes dies. The Poppy Parade hearts were die cut using the dies from the Give it a Whirl die set. Lastly, the turtle image from the Playing in the Rain stamp set was stamped on Basic White cardstock, colored using Granny Apple Green Stampin’ Blends, and die cut using the Playing in the Rain dies. To add some pizzaz, I used some Black and White 1/4″ gingham ribbon.
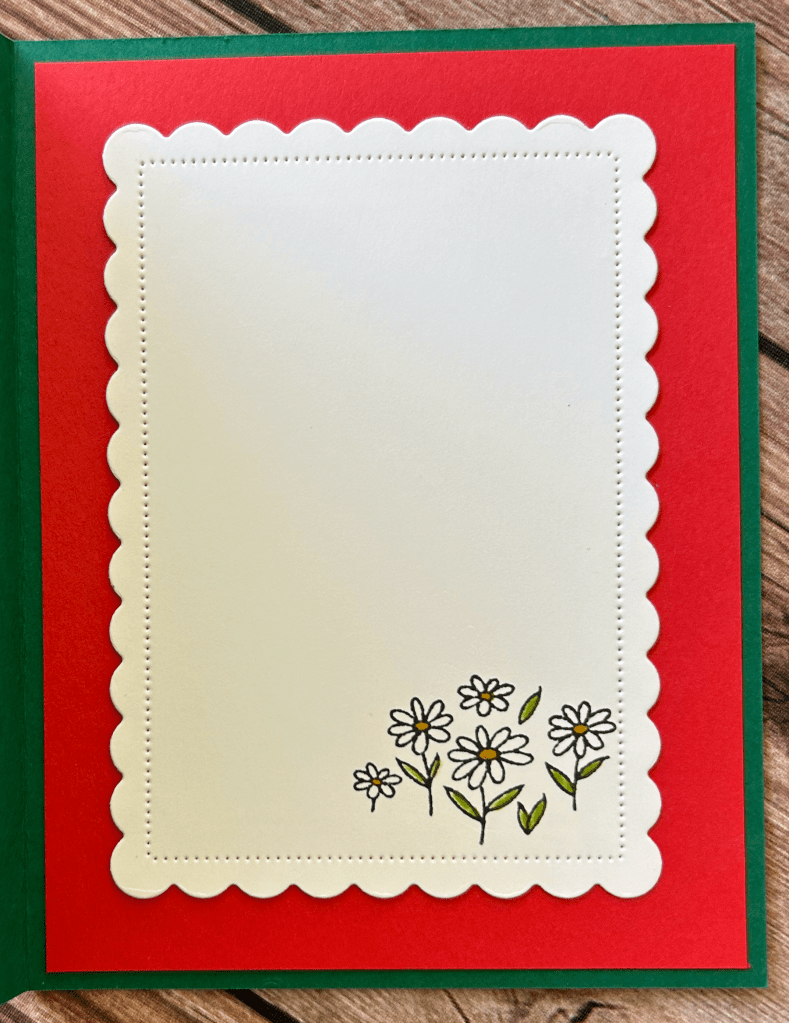
I really enjoyed adding a special touch to the inside of this card. The Poppy Parade layer is 5.25″ x 4″ and then I die cut a piece of Basic White cardstock using a scalloped rectangle die from the Scalloped Contour die set. Lastly, I stamped and colored the flowers from the Playing in the Rain stamp set.
I hope I inspired you to be creative. A list of supplies to create this card is below:
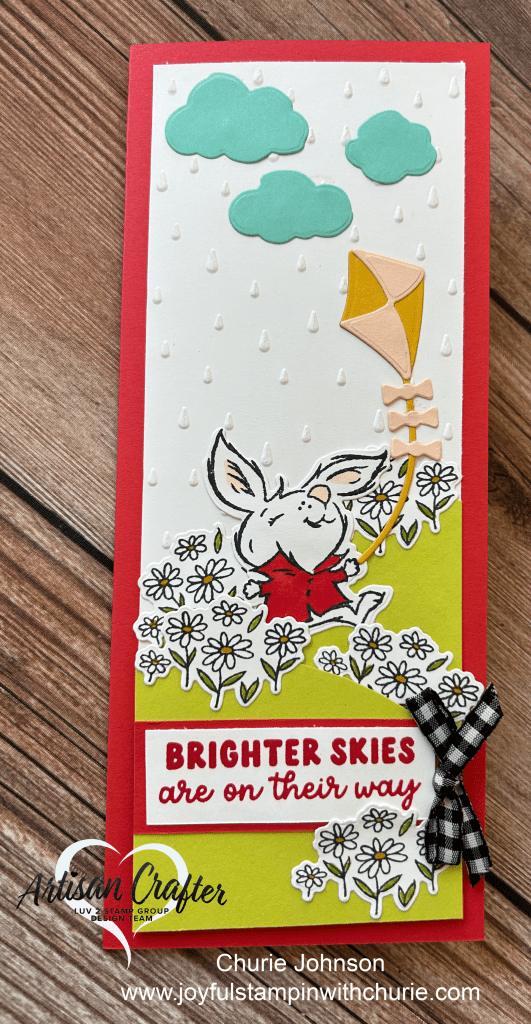
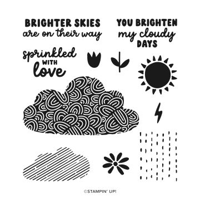
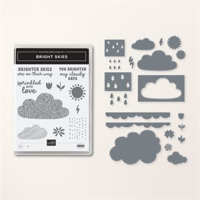
When I first saw the Stampin’ Up Bright Skies bundle the first thing that came to my mind was pairing it with the Playing in the Rain stamp set and dies and the Raindrops embossing folder which are in the Stampin’ Up 2023 -2024 Annual Catalog. The Playing in the Rain stamp set and dies are perfect to create some cute cards with.
The color combination I used to create this slimline card are the following:
I was inspired to make this card from the Stampin’ Up Sale-A-Bration brochure. I just love the the Bright Skies bundle in the January – April 2024 Stampin’ Up Mini Catalog and the Sunny Days Designer Series Paper (DSP) that can be earned during Sale-A-Bration with a qualifying purchase.
I used thick white cardstock for the card base (11″ x 4.25″ scored at 5.5″). Petal Pink DSP for the first layer (5.5″ x 4.25″). Basic white cardstock for the middle of the card (5.5″ x 3.25″). The raindrop DSP is 3″ x 3.25″. I used the cloud dies in the Brighter Skies bundle to die cut the clouds out of the Sunny Days DSP. The pool party cloud outline was created using cloud border die in the Brighter Skies bundle (measurement: 2″ x 3.25″). The sun was created by using the dies in the Brighter Skies bundle; the rays of the sun was die cut from Crushed Curry cardstock and the middle of the sun was die cut from Lemon Lolly cardstock. The sentiment was heat embossed on a Shaded Spruce label that was created by one of the label dies in the Something Fancy Dies.
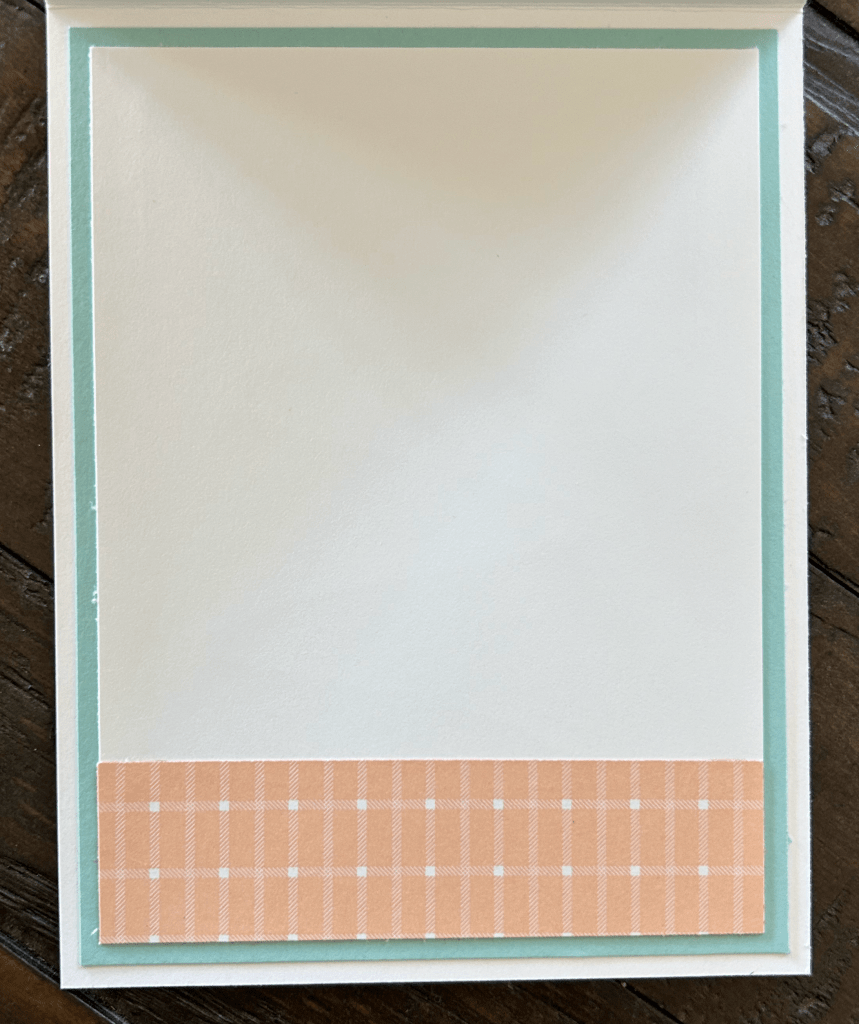
Inside of the card. Pool Party cardstock layer is 5.25″ x 4″. Basic White cardstock layer is 5″ x 3.75″. The Petal Pink strip is 1″ x 3.75″.
Supplies to create this card is below. Happy stamping! 🙂
I’m not sure about you, but when I looked in the Stampin’ Up January – April 2024 Mini Catalog that just launched on January 4, 2024 I was super excited. One of the bundles that caught my eye first was the Bright Skies bundle. I could envision having lots fun with the set. Then to my surprise I discovered that there is a coordinating 12″ x 12″ Designer Series Paper (DSP) for the Bright Skies bundle in the Stampin’ Up Sale-A-Bration brochure that can be earned with a $50 Stampin’ Up purchase.
Over the next couple of weeks I’d like to share with you some cute projects you can create with the Bright Skies bundle and Sunny Days 12″ x 12″ DSP.
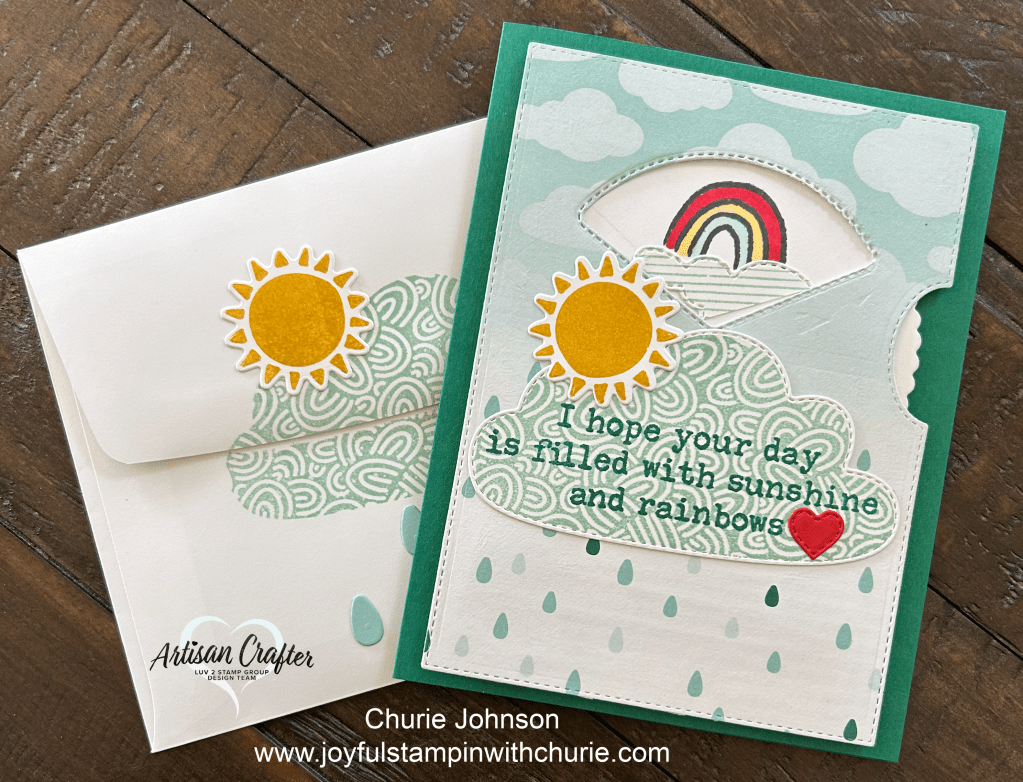
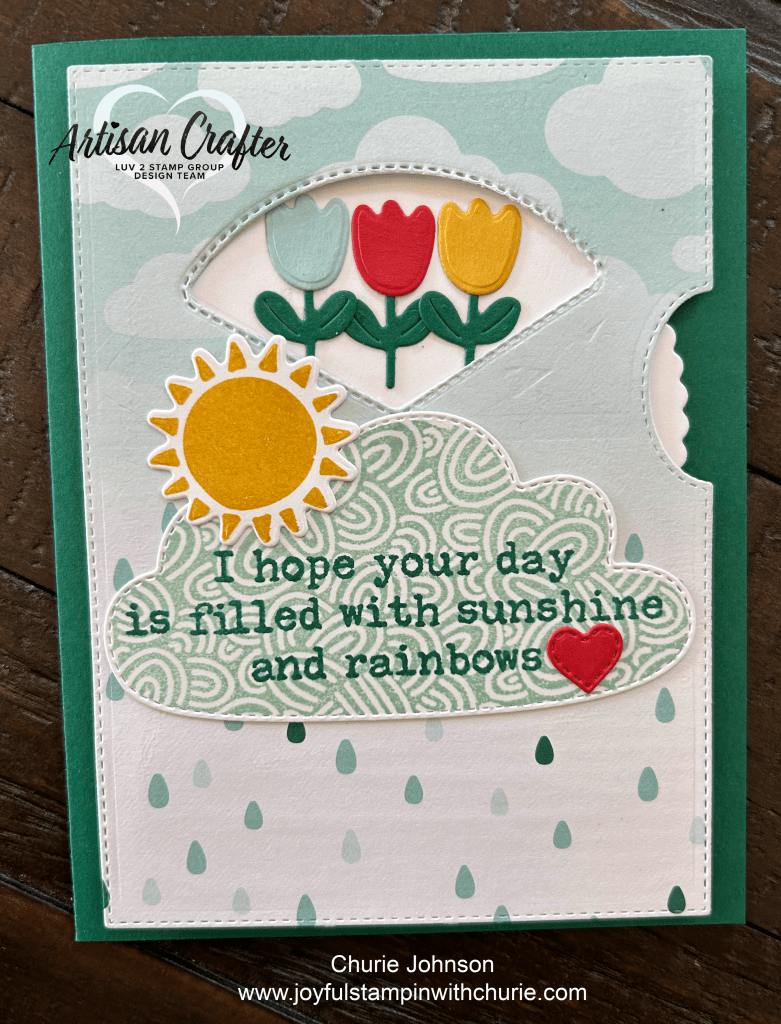
This first project that I made below challenged me to use the Stampin’ Up Give it a Whirl dies that I had on hand, but had not used yet.
The color combination I decided to use for this card is the following:
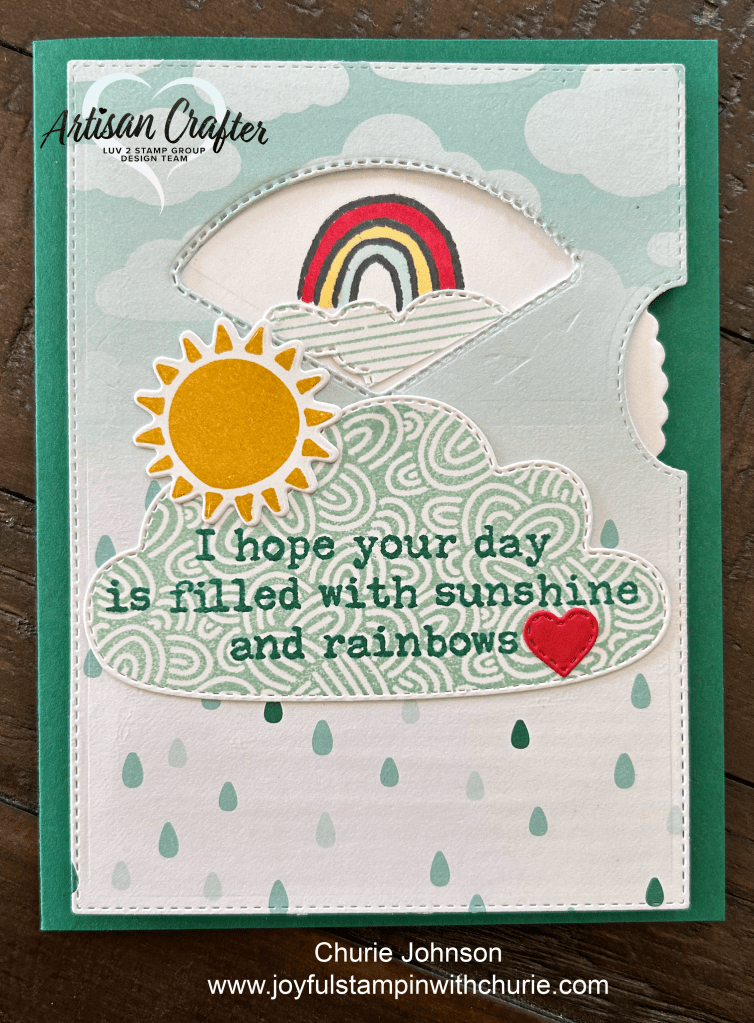
Front of card with the rainbow image stamped in the open slot. The rainbow image is from the Stampin’ Up Just My Type stamp set (2023-2024 Stampin’ Up Annual Catalog). I used Poppy Parade, Daffodil Delight, and Pool Party Stampin’ Blends to color the rainbow. The cloud was created by using one of the cloud dies included in the Stampin’ Up Give it a Whirl dies set. After die cutting the cloud, I used the striped cloud stamp that is a part of the Bright Skies bundle and stamped it on the cloud using the Pool Party stamp pad.
When you spin the wheel by moving the dial on the right side of the card downwards, the next image that shows up in the open slot is the one shown above. The Sprinkled With Love sentiment and die cut raindrops are from the Bright Skies bundle. The sentiment was stamped in Poppy Parade and the raindrops were die cut from Pool Party cardstock.
When you spin the wheel by moving the dial on the right side of the card downwards one more time, the next image that comes up is three flowers. The flowers were die cut using the Bright Skies bundle. The flower stems were die cut from Shaded Spruce cardstock and the flowers were die cut from Crushed Curry, Pool Party, and Poppy Parade cardstock.
The Shaded Spruce card base is 8.5″ x 5.5″ scored at 4.25″. The top layer was created by using the Give it a Whirl dies and Sunny Days DSP. The wheel was die cut in basic white cardstock from the die in the Give it a Whirl die set and it was attached to the card via a brad (the brad is covered by the cloud with the sentiment, I hope your day is filled with sunshine and rainbows).The cloud was stamped in Pool Party and die cut from the Bright Skies bundle. The sentiment is from the Stampin’ Up Just My Type stamp sent and was stamped in Shaded Spruce on the cloud. The sun was stamped in Crushed Curry on basic white cardstock and die cut using the Bright Skies bundle. Lastly, the Poppy Parade heart located after the sentiment was die cut using one of the hearts in the Give it a Whirl die set.
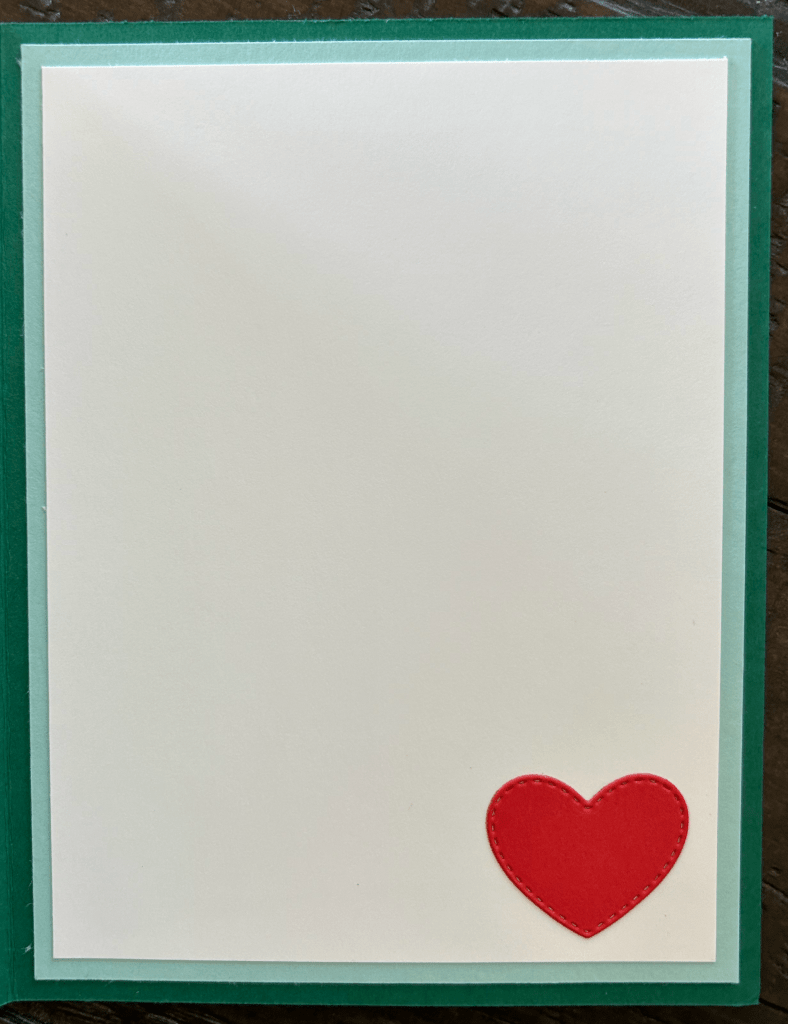
Inside of card. Measurements: Pool Party layer: 5.25″ x 4″. Basic White: 5″ x 3.75″. Poppy Parade heart was die cut using another heart shaped die that is included with the Stampin’ Up Give it a Whirl die set.
I hope I was able to inspire you. For the supplies I used to create this card, please see below. Happy stamping friends! 🙂