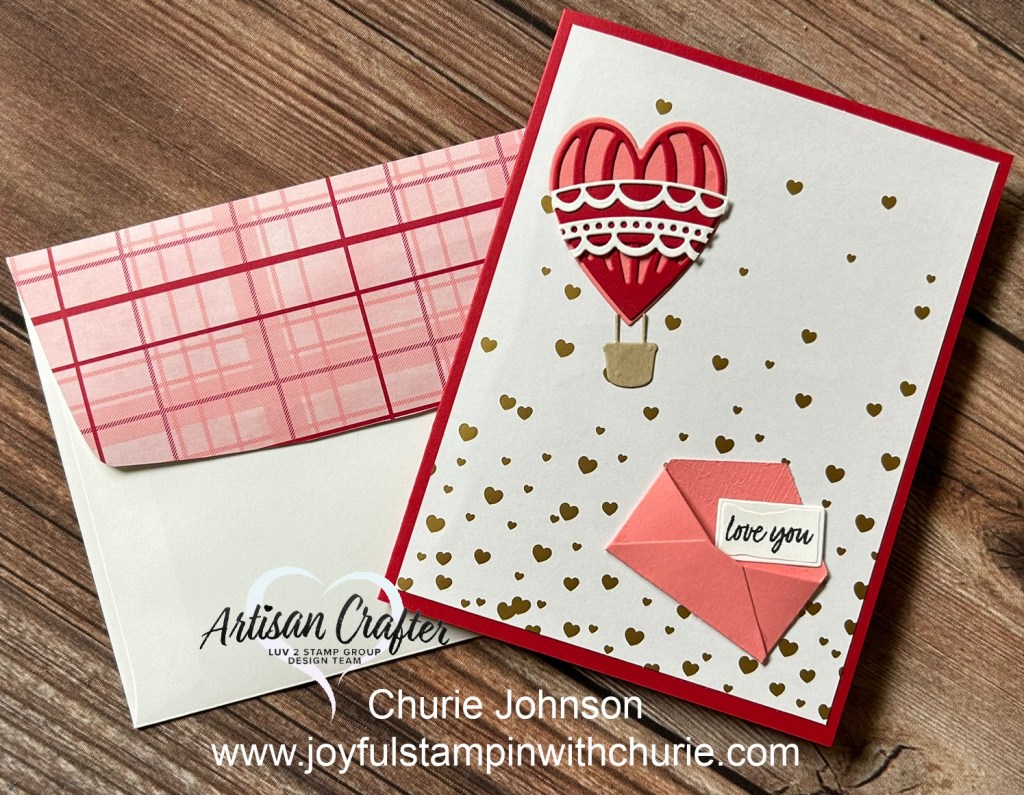
The Stampin’ Up Most Adored Designer Series Paper (DSP) makes it easy to create wonderful Valentine’s Day cards. The descending gold hearts on this DSP are just adorable on this card. I paired the Most Adored DSP with the Hot Air Balloon dies and Sending Love dies to create this card. The sentiments on this card are from the Country Bouquet stamp set.
Card measurements:
Real Red Card base: 5.5″ x 8.5″ (scored at 4.25″)
Designer Series Paper: 5.25″ x 8.25″
A list of supplies I used to create this Valentine’s Day card is below. Happy stamping! 🙂
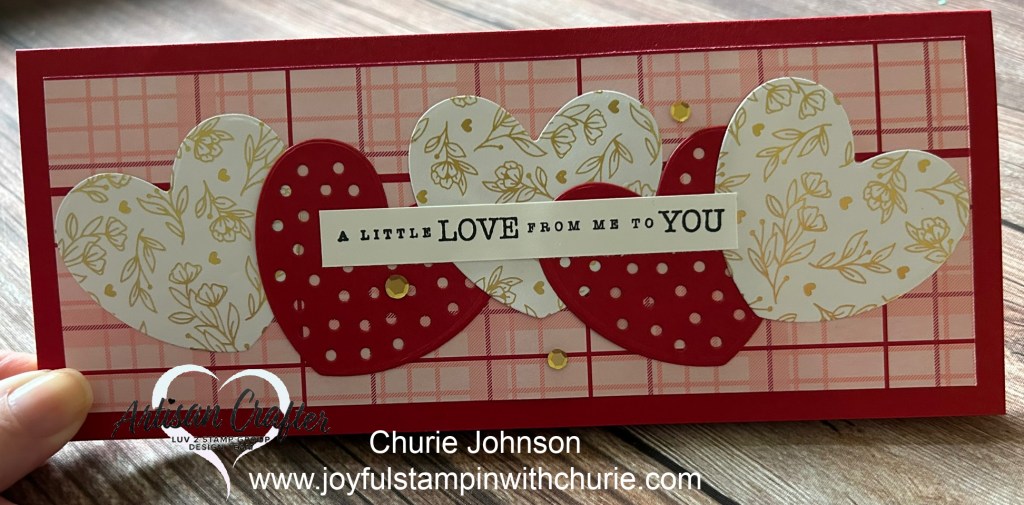
Valentine’s Day is right around the corner so I decided to have some fun with the Stampin’ Up Most Adored Designer Series Paper (DSP) which is one of the items you can earn for free during Sale-A-Bration with a minimum qualifying order. The colors I used for this slimline card is Real Red, Flirty Flamingo, and Gold. The hearts were created using the Stampin’ Up Hooray For Surprises dies. The sentiment, “A little love from me to you” is one of the stamps in the Sending Love stamp set.
Card measurements:
Card base: 7″ x 8.5″ (scored at 3.5″)
Designer Series Paper (front of card): 3″ x 8″
Designer Series Paper (inside of card): 3.25″ x 8.25″
Basic White cardstock (inside of card): 3″ x 8″
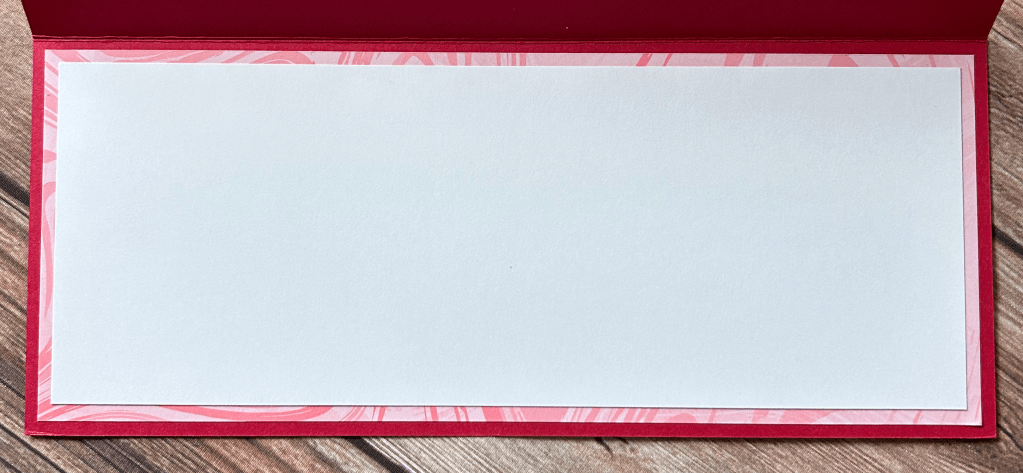
I decided to add some of the Most Adored Designer Series Paper to the inside of the card with Basic White cardstock layered on top of it. The Flirty Flamingo Swirl Designer Series Paper adds a little pizzaz to the inside of this card.
Below is a list of supplies I used to create this card. Happy Stamping! 🙂
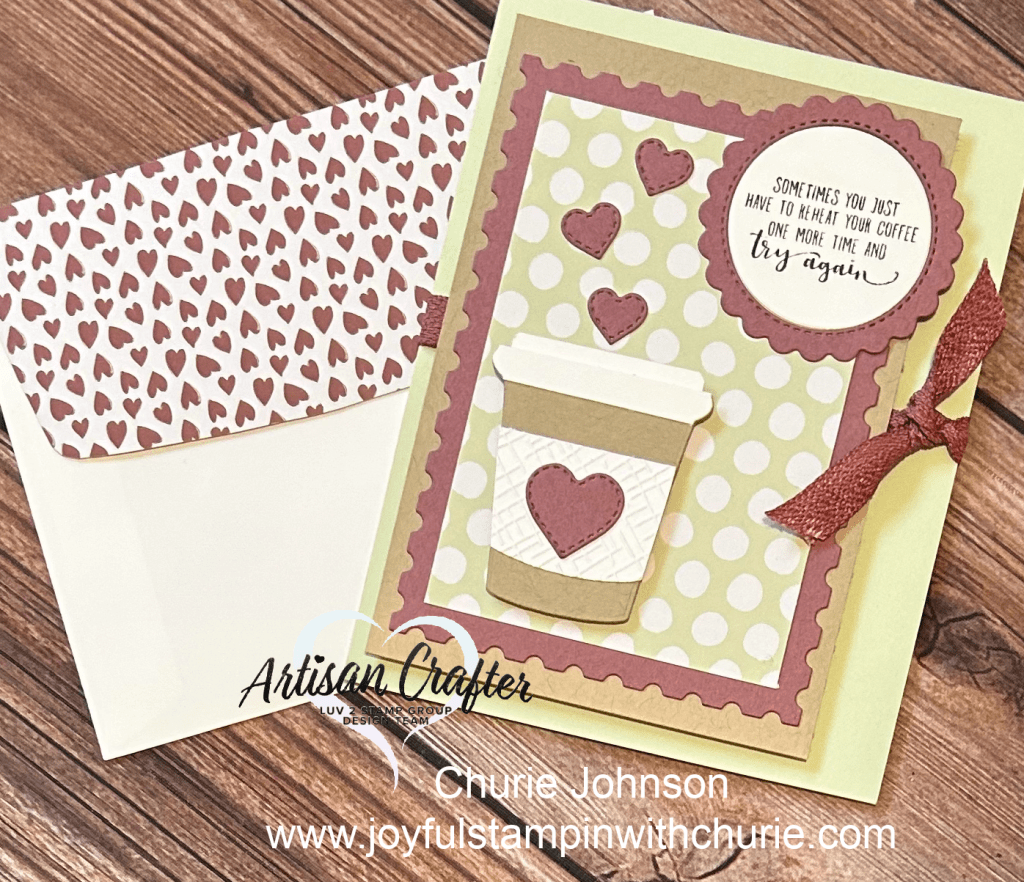
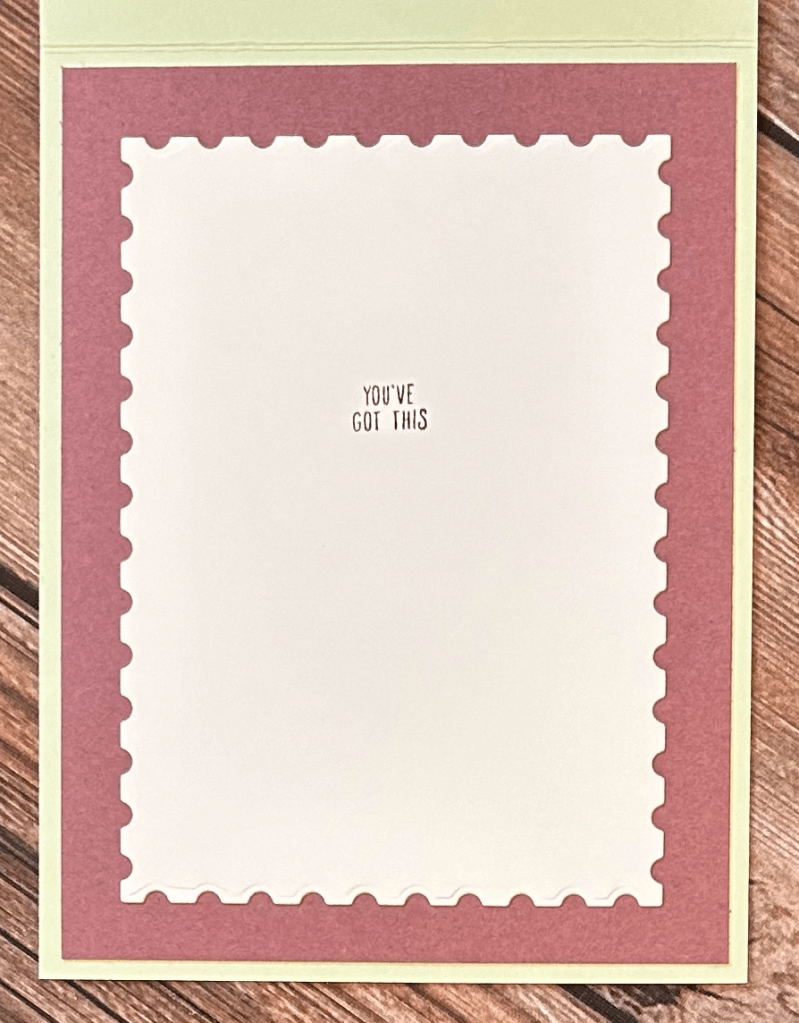
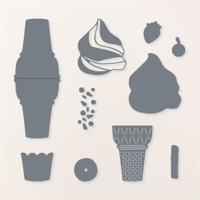
I made this cute card to encourage someone. I created the coffee cup using the Stampin’ Up ice cream cone die in the Ice Cream Swirl die set… yes, you read that correctly. 🙂 I used several Stampin’ Up die sets to make the card: Perennial Postage dies, Ice Cream Swirl dies, and Give it a Whirl dies. The sentiment, “Sometimes you just have to reheat your coffee one more time and try again,” is a part of the Stampin’ Up Coffee With Friends stamp set. To give this card some dimension, I raised the Crumb cake up using the Stampin’ Up Foam Adhesive Sheets.
The color combination I used for this card is the following:
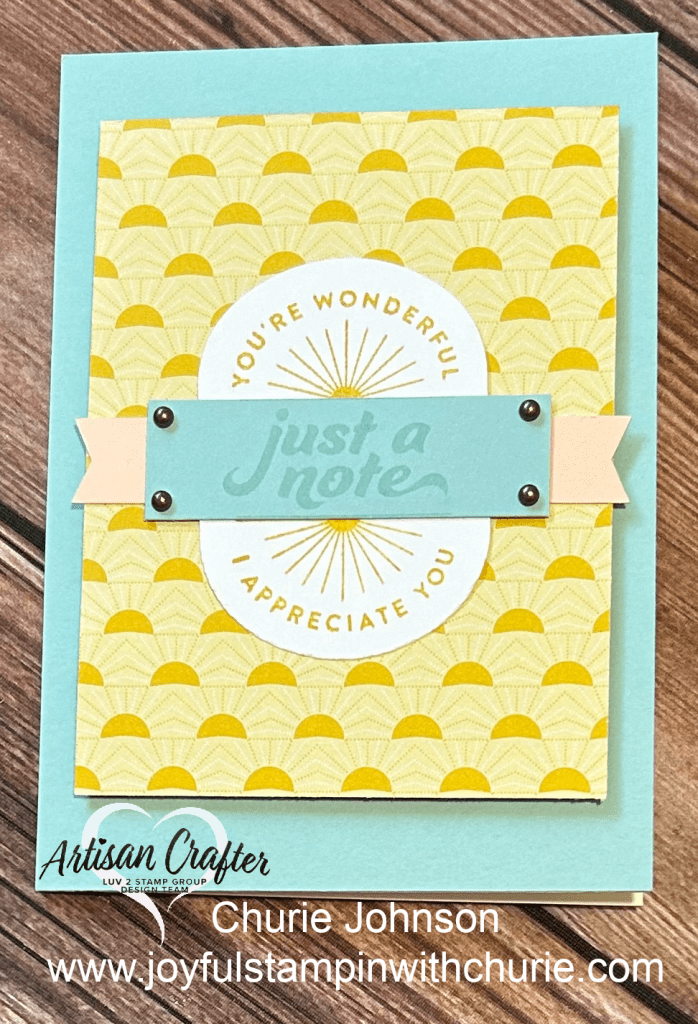
I just love how easy it is to create quick wonderful cards with the Stampin’ Up Filled With Happiness stamp set. For this card I used the Stampin’ Up Notes and Envelopes.
I used the following color combination for this card:
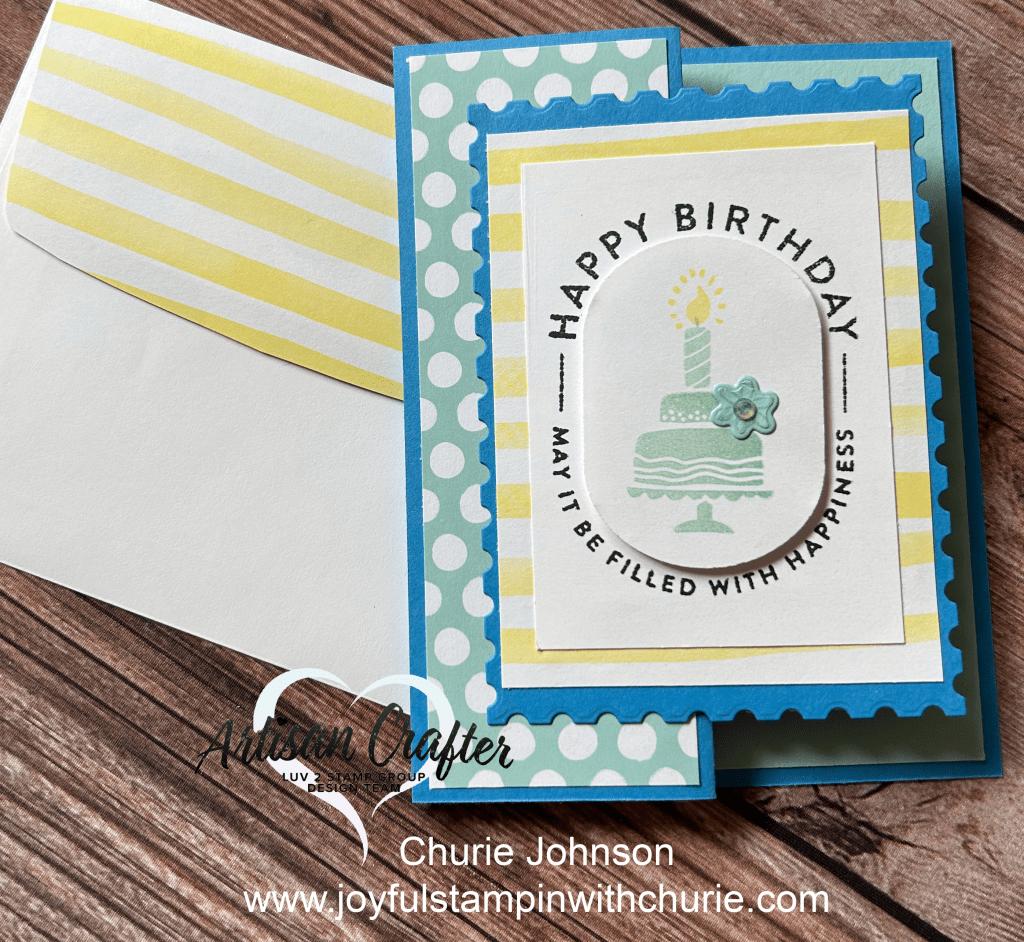
For this card I wanted to demonstrate how you can create a project using the Stampin’ Up Filled With Happiness stamp set without the Modern Oval punch.
When I received the Stampin’ Up Filled With Happiness stamp set and Modern Oval punch in the mail, I could not wait to create a card with them. I paired those projects with the Hooray For Surprises bundle to make this card.
Card base: 5.5″ x 8.5″ (scored at 2 1/8″ and 4 1/4″)
The Pool Party Polka Dot layer: 1 7/8″ x 5 3/8″
Azure Afternoon: Perennial Postage Dies
Lemon Lolly Striped DSP (front of card): 4″ x 3″
White cardstock: 3 1/2″ x 2 1/2″
Lemon Lolly Striped DSP (inside of card): 1 7/8″ x 5 3/8″
Pool Party layer (inside of card): 5 1/4″ x 4″
White Cardstock (inside of card): Perennial Postage Dies
Instructions: Stamp the Happy Birthday – May it be filled with happiness image onto a Basic White 3 1/2″ x 2 1/2″ piece of cardstock in Black Memento ink. Next, stamp the cake and candle images from the Hooray For Surprises bundle in Pool Party and the candle flame in Lemon Lolly on Basic White cardstock and use the Modern Oval punch to punch the oval shape out. Use Stampin’ dimensionals to adhere the Cake with candle image oval punched piece over the bird stamped image. I then stamped the flower image from the Hooray For Surprises bundle in Pool Party ink on Pool Party cardstock and die cut the image out using the coordinating dies. Lastly, you will assemble all the pieces together to make the card. Please note I used Tear and Tape adhesive (a stronger adhesive) on the Azure Afternoon Postage piece when I adhered it to the front of the card.
The supplies I used to create this cute birthday card is below. Happy stamping! 🙂
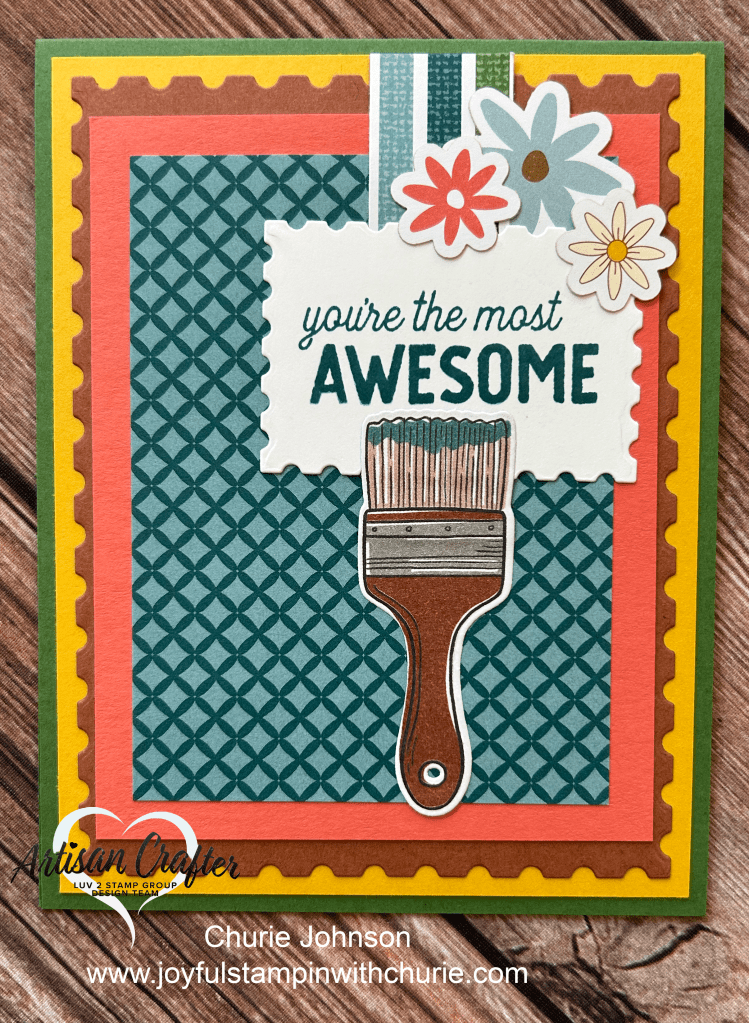
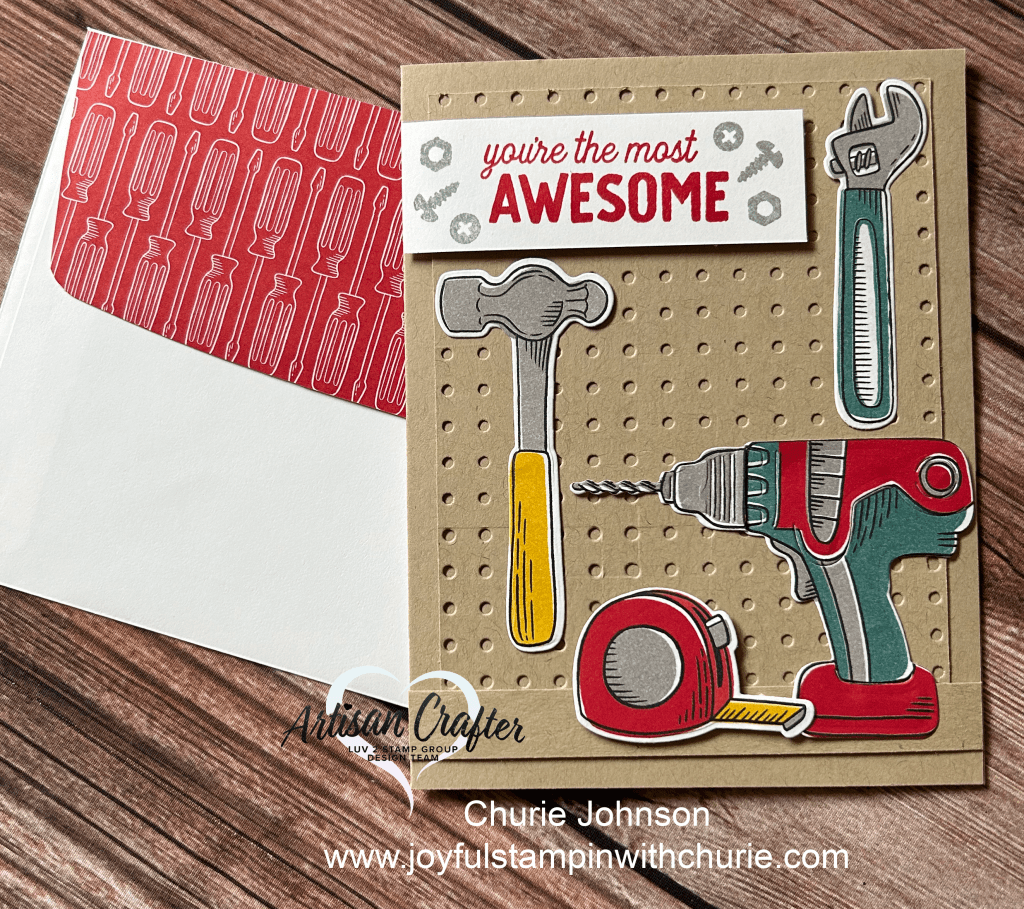
Who doesn’t love adding a little creativity to their projects? I wanted to be creative with the Stampin’ Up Trusty Tools bundle, Trusty Toolbox 12″ x 12″ Designer Series Paper (DSP), Sweet Thoughts Memories and More Card Pack, and the Perennial Postage dies.
Instructions: The paint brush was die cut from the Trusty Toolbox DSP using the Trusty Tools dies. The sentiment was stamped in Pretty Peacock ink on the Basic White cardstock Postage Stamp die cut piece. The flowers are from the Sweet Thoughts and Memories Card Pack. The three paint lines came from one of the cards in the Sweet Thoughts and Memories Card Pack.
Below is a list of Stampin’ Up products I used to create this card. Happy stamping! 🙂
Creating projects with the Stampin’ Up Trusty Tools bundle is so much fun. I used the Trusty Tools dies to die cut all of the tools from the Trusty Toolbox Designer Series Paper (DSP). I just love how Stampin’ Up creates coordinating products and when some of the dies will cut out images from the DSP.
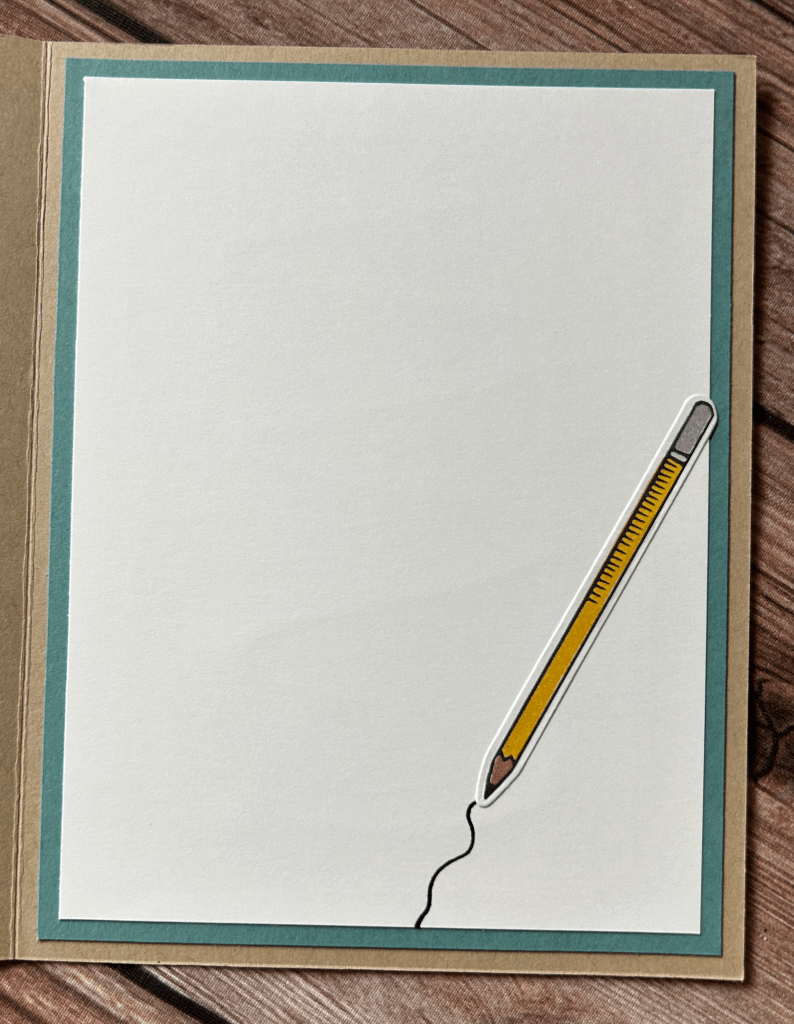
Want to add a little fun to your card? Just use a black Stampin’ Write Marker to draw a line from the pencil. The pencil was die cut from the Trusty Toolbox DSP.
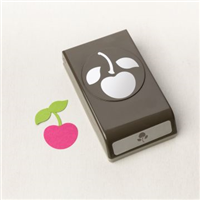
Today I paired the Sweetest Cherries stamp set and Cherry Builder punch with the Sunny Days Designer Series Paper (DSP) which is a Stampin’ Up Sale-A-Bration item you can earn with a qualifying Stampin’ Up purchase.
To create this card, I stamped the sentiment from the Sweetest Cherries stamp set on Basic White cardstock and then fussy cut them using scissors. Next, I die cut one Shaded Spruce circle and one Basic White circle using the Stylish Shape dies. On the Basic White circle I stamped the cherry image in Poppy Parade ink, the stem in Black ink, and the leaves in Shaded Spruce. I wanted to give my card some dimension so I decided to stamp and punch out another cherry using the same colors as before and used Stampin’ Dimensionals to adhere it to the card.
Card Measurements:
Card base: 11″ x 4.25″ (scored at 5.5″)
Shaded Spruce layer: 4″ x 4.25″
Sunny Days DSP layer: 3.5″ x 4.25″
The Stampin’ Up supplies I used to make this project is below. Happy stamping! 🙂
Today I wanted to highlight two of the Sale-A-Bration products that a person can earn with a qualifying Stampin’ Up order: Sunny Days 12″ x 12″ Designer Series Paper (DSP) and Heartfelt Hellos stamp set that coordinates with the Heartfelt Hexagon punch.
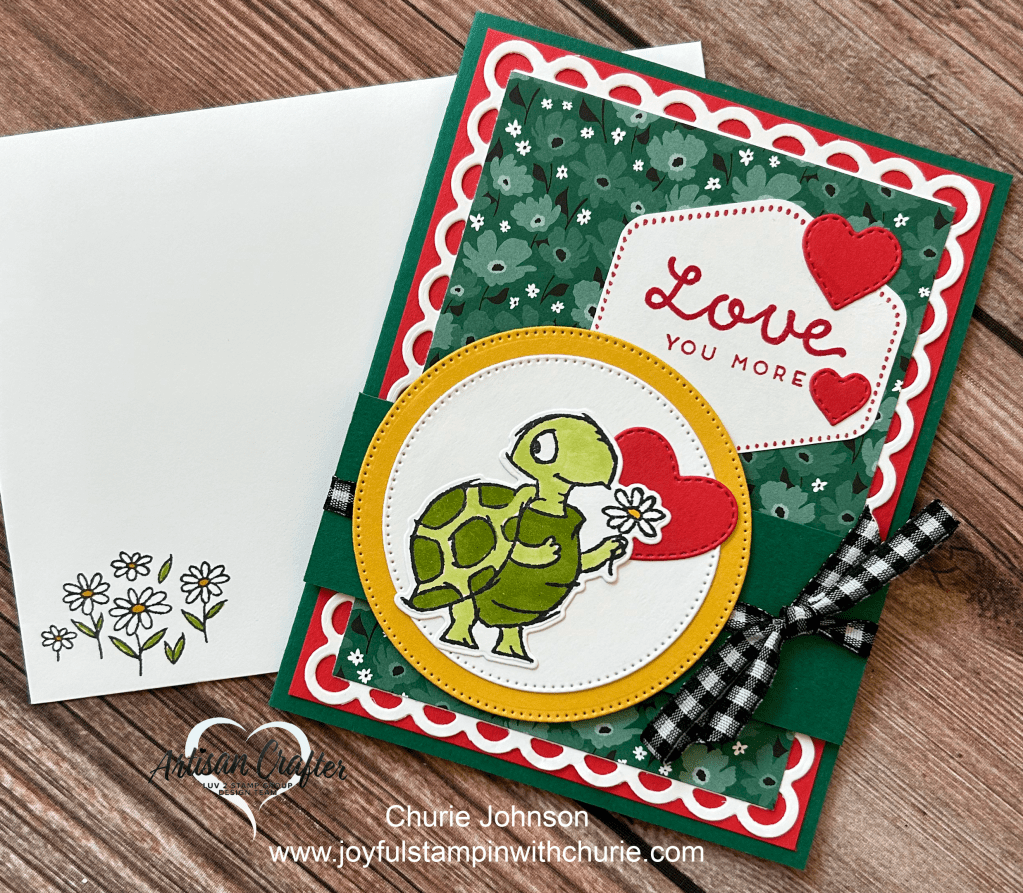
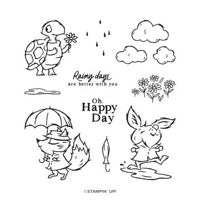
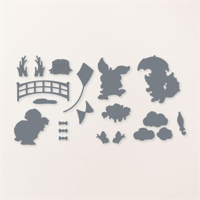
This card was a lot of fun to make. I mixed and matched a lot of Stampin’ Up products. The Shaded Spruce card base is 5.5″ x 8.5″ (scored at 4.25″). The Poppy Parade layer is 5.25″ x 4″. Next, I die cut a scalloped rectangle using the Scalloped Contour die set. The Sunny Days DSP layer is 4.75″ x 3.5″. The Shaded Spruce strip is 1.5″ x 4.25″. The Love You More Sentiment from the Heartfelt Hellos stamp set was stamped on Basic White cardstock in Poppy Parade ink, the border was stamped in Poppy Parade ink using the image from the Stampin’ Up Heartfelt Hexagon stamp set, and then it was punched out using the Heartfelt Hexagon punch. The Crushed Curry and Basic White circles were die cut using the Stylish Shapes dies. The Poppy Parade hearts were die cut using the dies from the Give it a Whirl die set. Lastly, the turtle image from the Playing in the Rain stamp set was stamped on Basic White cardstock, colored using Granny Apple Green Stampin’ Blends, and die cut using the Playing in the Rain dies. To add some pizzaz, I used some Black and White 1/4″ gingham ribbon.
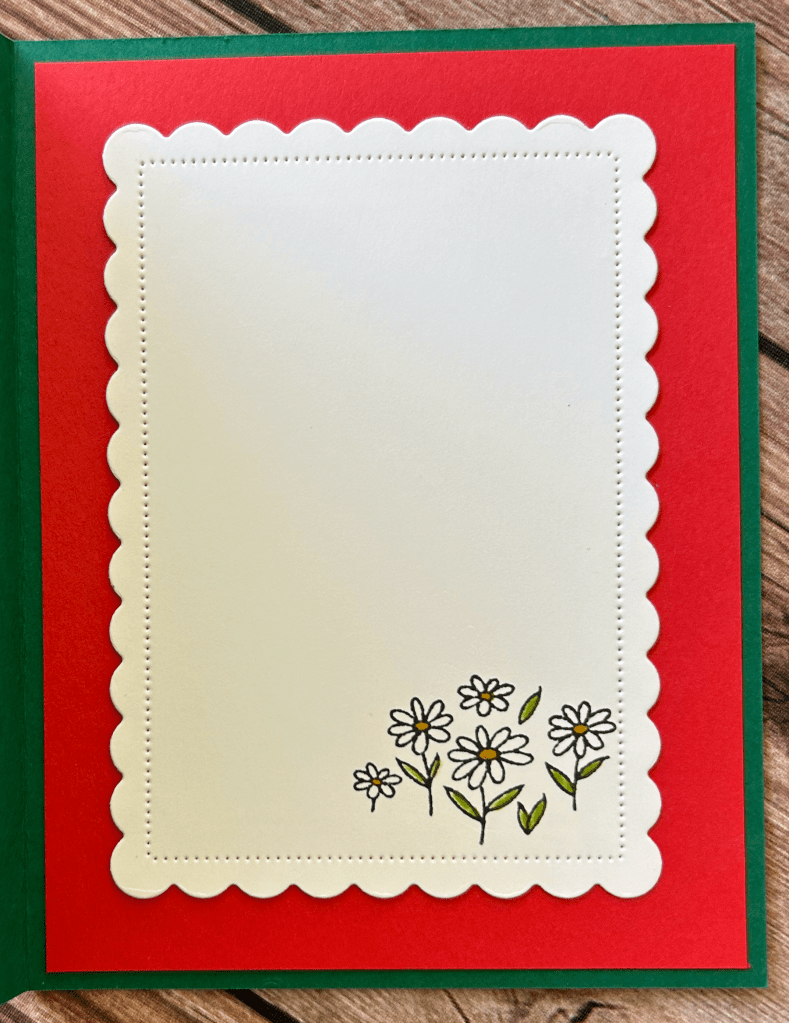
I really enjoyed adding a special touch to the inside of this card. The Poppy Parade layer is 5.25″ x 4″ and then I die cut a piece of Basic White cardstock using a scalloped rectangle die from the Scalloped Contour die set. Lastly, I stamped and colored the flowers from the Playing in the Rain stamp set.
I hope I inspired you to be creative. A list of supplies to create this card is below: