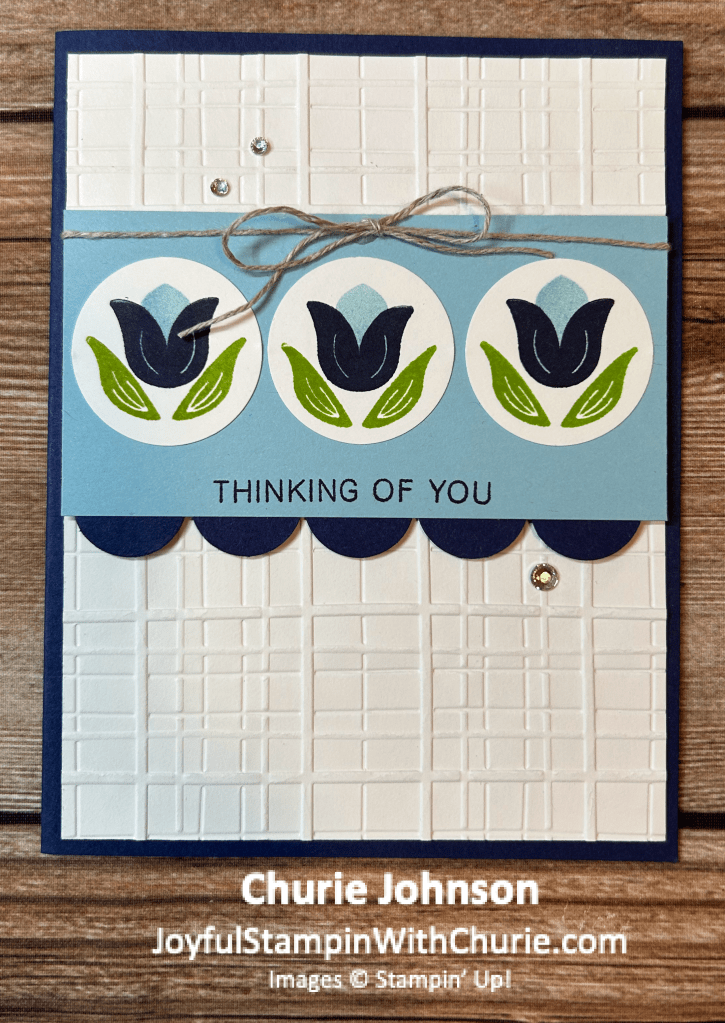
I am having lots of fun with the Stampin’ Up Sunshine & Tulips bundle. For this card I decided to stamp the tulips on three circles. To create the stamped tulips I first stamped the center of them using the Balmy Blue stamp pad. Next, I stamped the outside petals of the tulips in Night of Navy. Lastly, I stamped the tulip’s leaves in Granny Apple Green. The color combination a person can use to create these beautiful tulips is endless.
I created the Night of Navy scallop edging on the front of the card by using circles (half of the circles are glued to the Balmy Blue layer. To add some pizzaz to the card, I raised up the Balmy Blue layer that has the three tulips on it with Stampin’ dimensionals, used linen thread to tie a bow around the Balmy Blue layer, and added some rhinestone basic jewels.
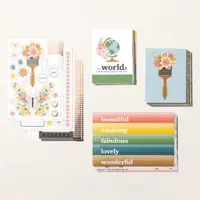
The list of supplies I used to create this pretty card is below.
For this card featuring the Stampin’ Up Sunshine & Tulips bundle I decided to use the True Blue Florals 12″ x 12″ Designer Series Paper (DSP) which was the December Product of the Month that is still available to purchase for $5.00 (while supplies last) when you place a qualifying Stampin’ Up order of $75.00.
The colors I used for this card are the following:
Cardbase (Basic White): 11″ x 4..25″ scored at 5.5″
True Blue Florals Designer Series Paper (DSP) Layer: The large Sunshine & Tulips die cuts out this whole piece.
Sentiment Layer: The Sunshine & Tulip die cuts out the label.
Misty Moonlight Layer (inside of the card): 4″ x 5.25″
Basic White Layer (inside of the card): 3.75″ x 5″
You will need to die cut one piece of the True Blue Florals Designer Series Paper (DSP) and one piece of Poppy Parade cardstock with the large Sunshine & Tulips die.
I used mini Stampin dimensionals behind the Poppy Parade tulips to give the card some more dimension. I used the regular Stampin dimensionals behind the sentiment label. Lastly, I used multipurpose glue to adhere the tiny bee trinkets to the card.
You will want to adhere an adhesive sheet to a piece of Poppy Parade cardstock (this will be used to die cut the outline of the tulips) and a piece of Granny Apple Green cardstock (this will be used to die cut the leaves). You can use liquid glue for this step, but I have found it much easier to use the adhesive sheets.
The supplies I used to create this cute card are the following:
I just love all the different color combinations you can use with the Stampin Up Sunshine & Tulips bundle. The colors I used for this card are the following:
Pool Party Layer: The large Sunshine & Tulips die cuts out this whole piece.
Sentiment Layer: The Sunshine & Tulips die cuts out the label.
Pool Party Layer (inside of card): 4″ x 5.25″
Basic White Layer (inside of card): 3.75″ x 5″
You will need to die cut one piece of the Pool Party cardstock and one piece of Melon Mambo cardstock with the large Sunshine & Tulips die.
I used mini Stampin’ dimensionals behind the Melon Mambo tulips to give the card some more dimension. I used the regular Stampin dimensionals behind the sentiment label. Lastly, I used multipurpose glue to adhere the tiny bee trinkets to the card.
You will want to adhere an adhesive sheet to a piece of Melon Mambo cardstock (this will be used to die cut the outline of the tulips) and a piece of Lemon Lime Twisit cardstock (this will be used to die cut the leaves). You can use liquid glue for this step, but I have found it much easier to use the adhesive sheets.
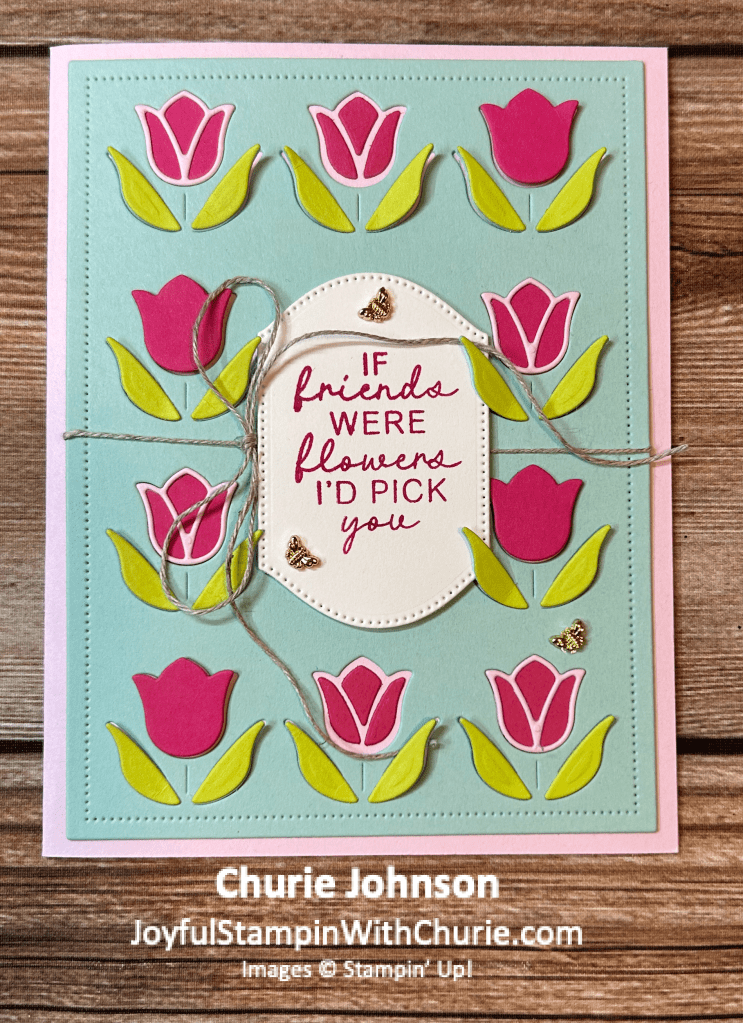
Supplies I used to create this project are the following:
Granny Apple Green Layer: The large Sunshine & Tulips die cuts out this whole piece.
Sentiment Layer: The Sunshine & Tulips die cuts out the label.
Melon Mambo layer (inside of card): 4″ x 5.25″
Basic White layer (inside of card): 3.75″ x 5″
You will need to die cut one piece of Granny Apple Green cardstock and one piece of Melon Mambo cardstock with the large Sunshine & Tulips die.
I used mini Stampin’ dimensionals behind the Melon Mambo tulips to give the card more dimension. I used the regular Stampin’ dimensionals behind the sentiment label. Lastly, I used multipurpose glue to adhere the tiny bee trinkets to the card.
You will want to adhere an adhesive sheet to a piece of Melon Mambo cardstock (this will be used to die cut the outline of the tulips) and a piece of Garden Green cardstock (this will be used to die cut the leaves). You can use liquid glue for this step, but if is much easier to use the adhesive sheets.
The supplies I used to create this spring card are below:
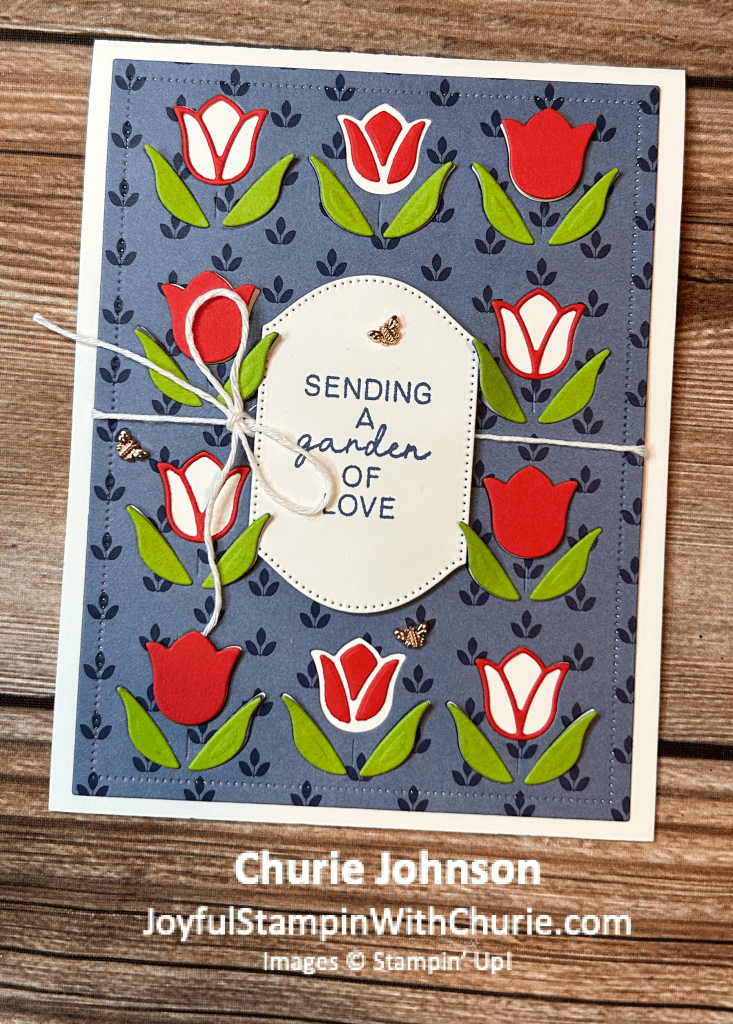
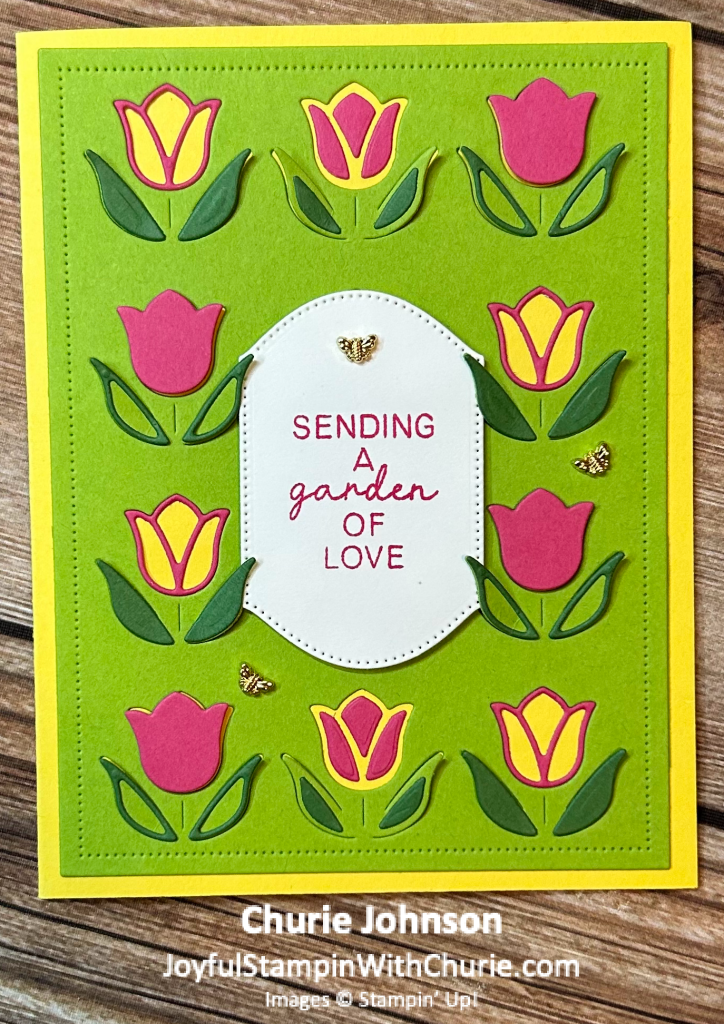
I am not sure about you, but I love flowers. One of my favorite flowers are tulips. When I lived overseas I had the opportunity to explore Holland and while I was there I went to the annual Tulip Festival. The tulips were absolutely beautiful.
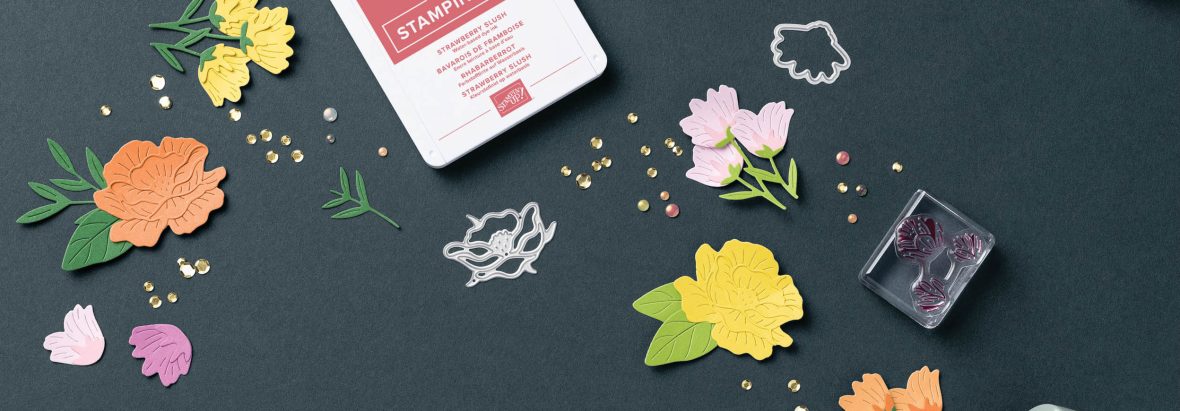
When I saw the Stampin’ Up Sunshine & Tulips bundle in the 2026 Spring Mini Catalog I knew I needed to get it. This last week I was able to create several projects using this fun bundle.
For this first project I used the following Stampin’ Up Color Combination:
Lemon Lime Layer: The large Sunshine & Tulip die cuts out this whole piece.
Sentiment Layer: The Sunshine & Tulip die cuts out the label.
Melon Mambo Layer (inside of card): 4″ x 5.25″
White Layer (inside of card): 3.75″ x 5″
You will need to die cut one piece of Lemon Lime Twist cardstock and one piece of Melon Mambo cardstock with the large Sunshine & Tulip die.
I used mini Stampin’ dimensionals behind the Melon Mambo tulips to give the card more dimension. I used the regular Stampin’ dimensionals behind the sentiment label. Lastly, I used multipurpose glue to adhere the tiny bee trinkets to the card.
You will want to adhere an adhesive sheet to a piece of Melon Mambo cardstock (this will be used to die cut the outline of the tulips) and a piece of Garden Green cardstock (this will be used to die cut the leaves). You can use liquid glue for this step, but it is a thousand times easier and a lot more enjoyable to create this card if you use the adhesive sheets.
The supplies I used to create this fun card are below:
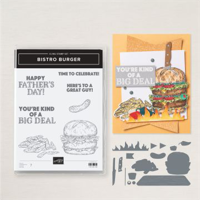
What a fun Stampin’ Up bundle: Bistro Burger! 🙂 I was selected as one of the three guest stampers in the Luv 2 Stamp Group to create projects using different Stampin’ Up bundles in the 2024 annual catalog. This is the bundle I will be creating 6 projects with during the month of August.
The color combination I used for this slimline card is the following:
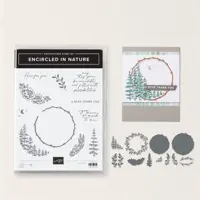
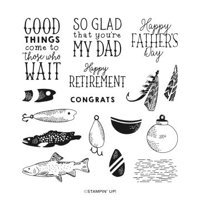
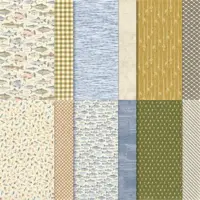
Father’s Day is next month, so I decided to make my dad a card. I created this card using the Stampin’ Up Encircled In Nature bundle (Online Exclusive). I paired the bundle with the Stampin’ Up Gone Fishing stamp set and Let’s Go Fishing Designer Series Paper.
Pecan Pie layer: Stampin’ Up Deckled Rectangle Dies
Let’s Go Fishing Designer Series Paper: Stampin Up Deckled Rectangle Dies
Vellum: 4.25″ x 3.25″
A list of supplies I used to make this card is below. Please note the Let’s Go Fishing Designer Series Paper and vellum may not be no longer available… they both recently retired. Happy stamping! 🙂
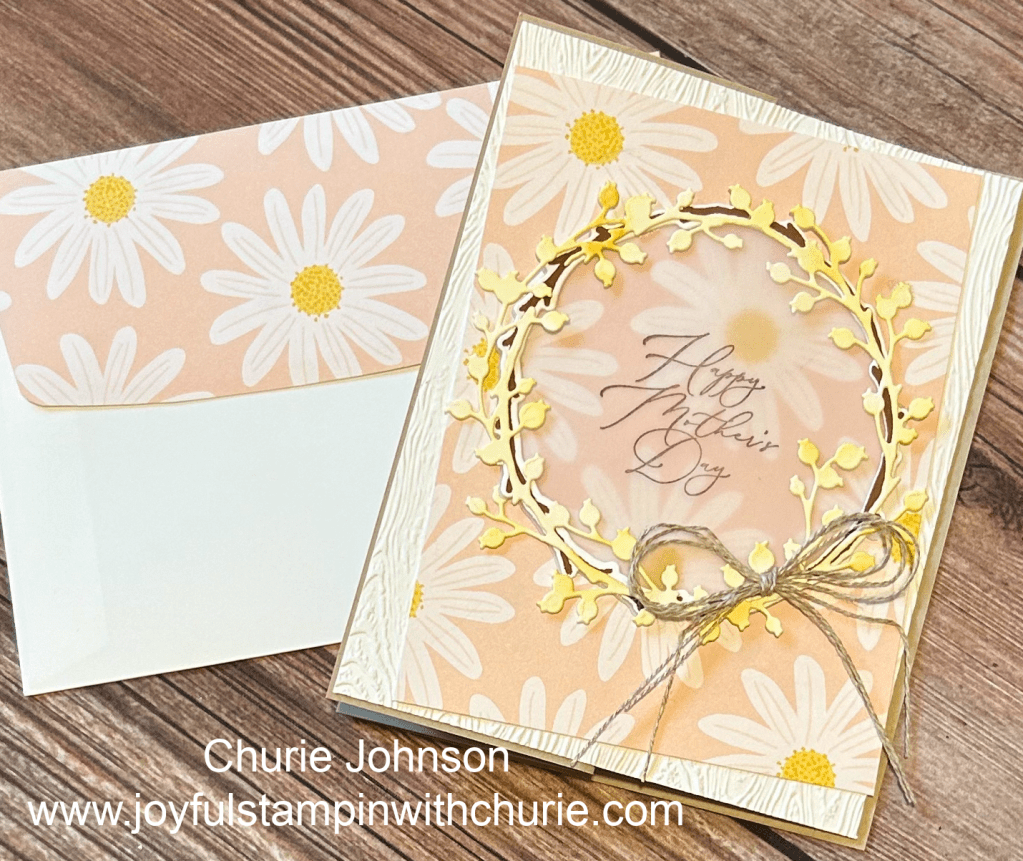
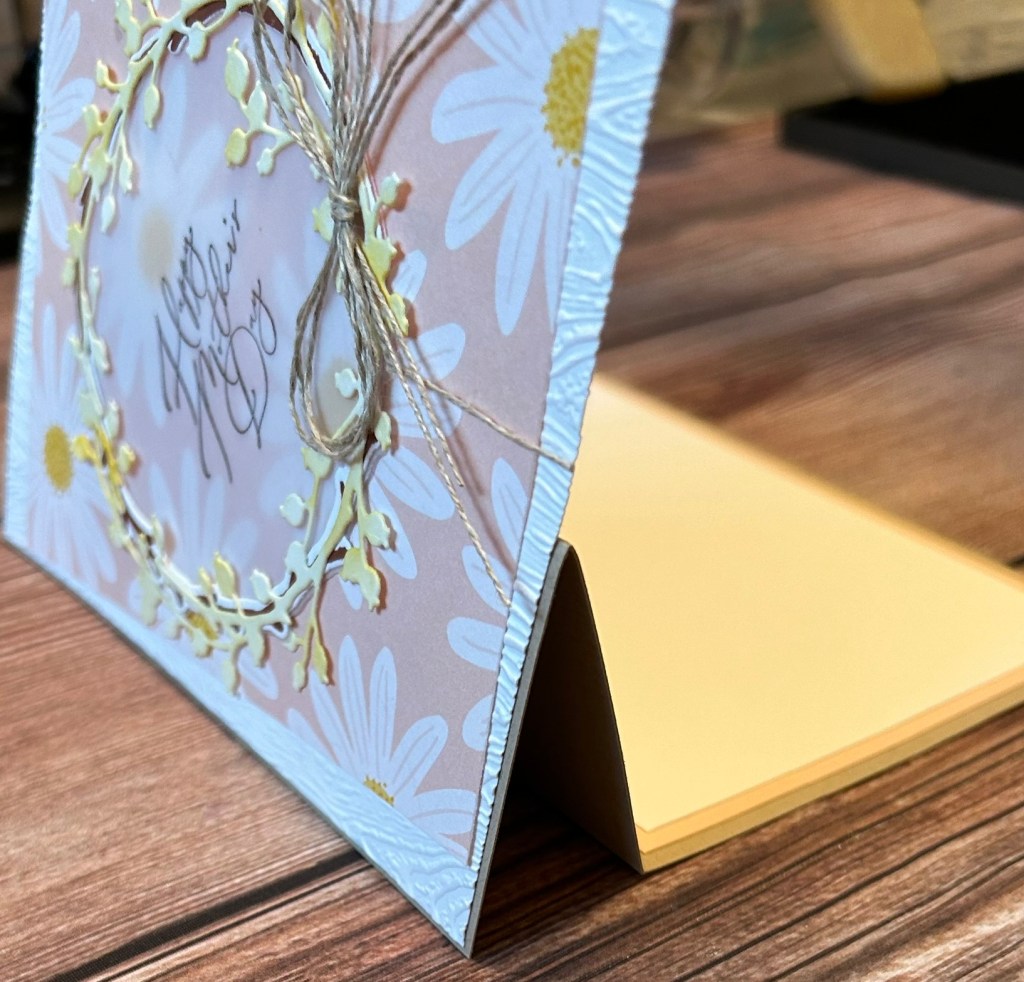
I just love how elegant this Mother’s Day card turned out. I paired the Stampin’ Up Encircled In Nature bundle (Online Exclusive) with the Stippled Roses stamp set to create this fun fold card. The Crumb Cake card base is 5.5″ x 8.5″ (scored at 4.25″) and then I folded the front of the card in half (see picture below).
The front of the card is 5.25″ x 4″. I embossed the Basic White cardstock with the Timber 3D Embossing Folder. Next, I layered the Delightfully Eclectic Designer Series Paper (5″ x 3.75″) off-centered. Then, I created the focal point of the card. I stamped the wooden wreath image onto a Basic White using the Pecan Pie Classic Stampin’ Pad and die cut it out using the coordinating die. Next, I die cut two flower wreaths using the Encircled In Nature Dies. I used a blending brush with the Lemon Lolly Classic Stampin’ Pad to add a hint of color on one of the flower wreaths. Then I used the wood wreath die from the Encircled In Nature dies to die cut a piece of vellum. For the Happy Mother’s Day sentiment which is a part of the Stippled Roses stamp set, I stamped it onto the piece of vellum using the Early Espresso Classic Stampin’ Pad and used my heat tool to dry it. After the inked dried, I then layered the wreath on top of the wreath, adhered it all together and added a line bow on top of it.
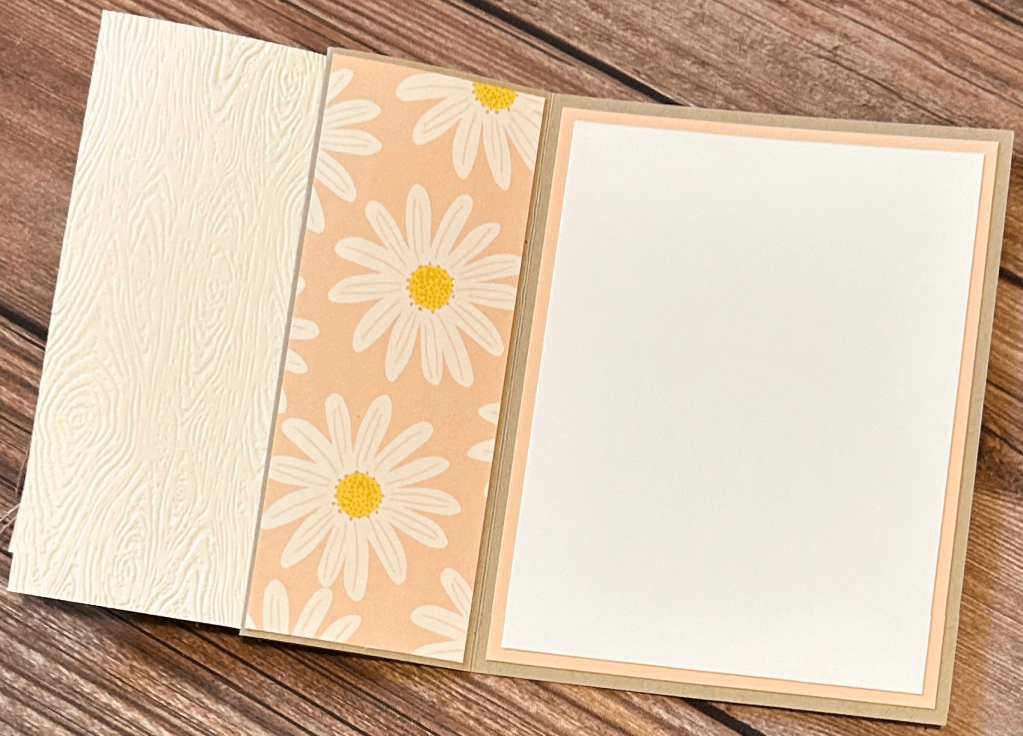
I wanted to add some pizzaz to the inside of the card (see picture above) so I added a strip of the Delightfully Eclectic Designer Series Paper (5.25″ x 2″) and layered Basic White cardstock (5″ x 3.75″) on top of a piece of Bubble Bath cardstock (5.25″ x 4″).
Below is a list of supplies that I used to create this card. NOTE: the Delightfully Eclectic Designer Series Paper and vellum may not be no longer available to purchase since they both just retired). Happy stamping! 🙂
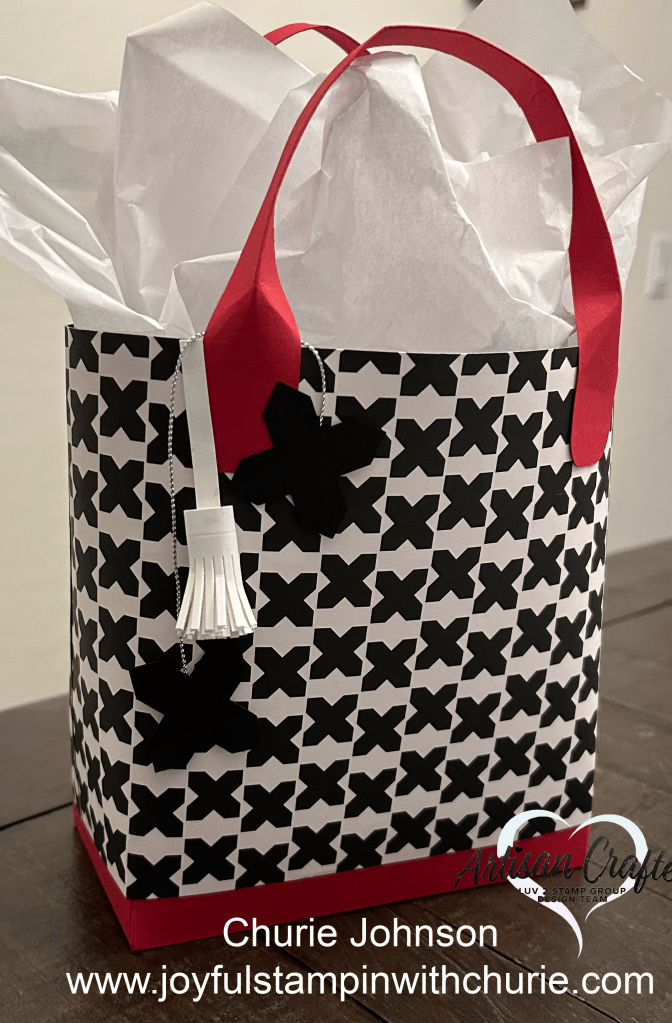
I created this fabulous handbag using three Stampin’ Up retiring products: Delightfully Eclectic 12″ x 12″ Designer Series Paper (DSP), Inked & Tiled Punch Pack, and Beautiful Balloons Dies. If you would like to create this handbag, it is not too late to get these retiring products that will not be available after April 30th or while supplies last (which ever is soonest).
2 pieces of Designer Series Paper: 12” x 6” and 7” x 6” (sides of handbag)
2 pieces of cardstock: 1” x 11” (handles for the handbag)
Cardstock: 1.5” x 8” (optional tassel)
Instructions:
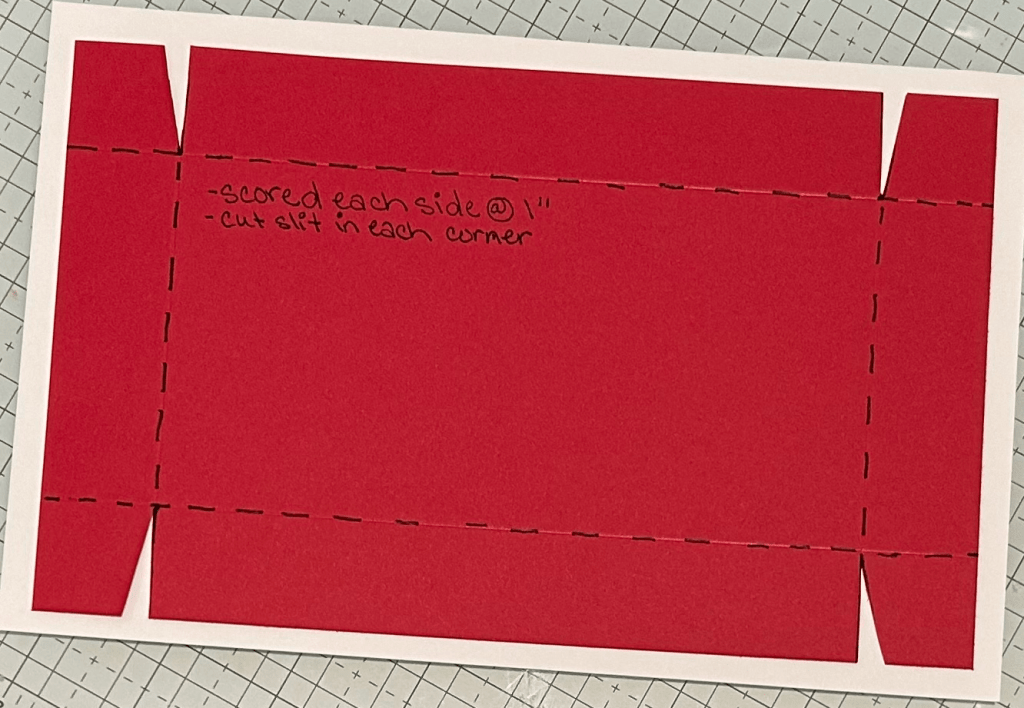
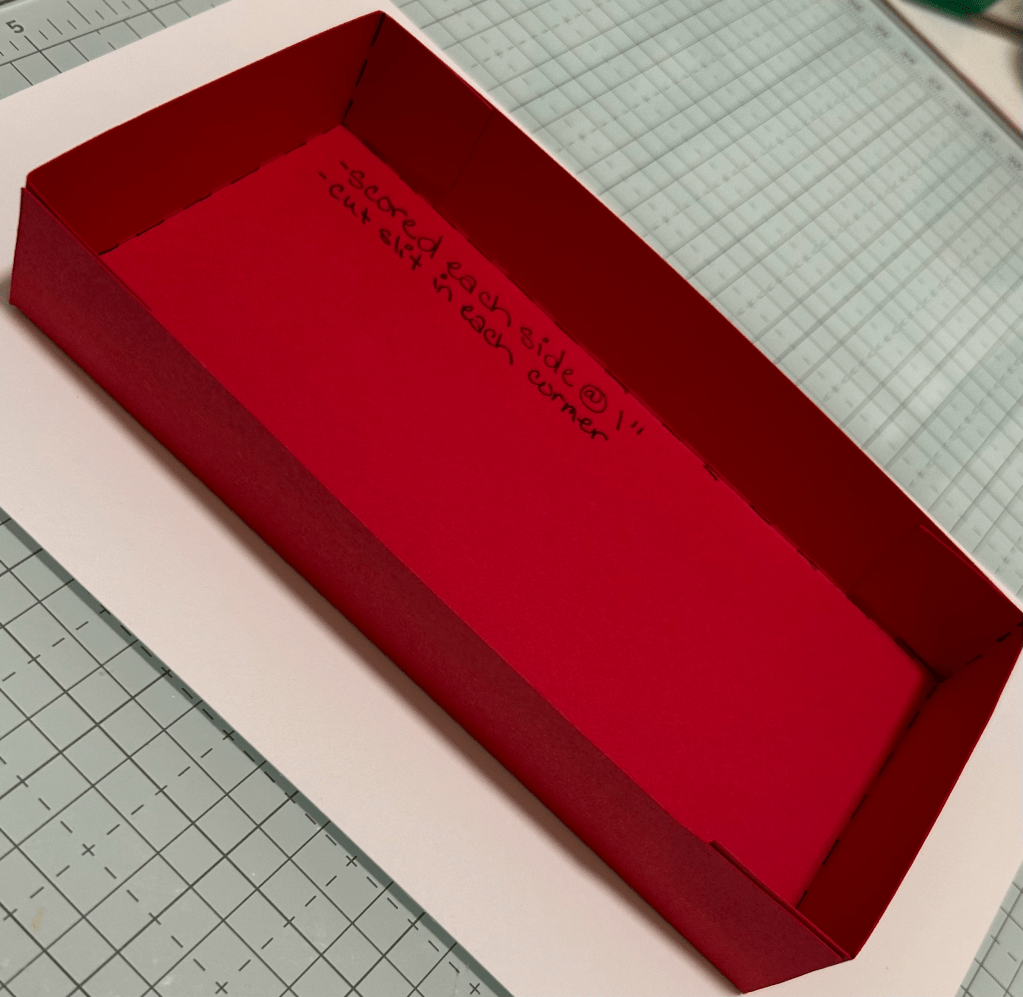
To create the base of the handbag, take the 5″ x 8″ piece of cardstock and score it 1″ on every side. Next, cut a little slot out from each corner as shown in the picture above. After the little slots are cut out, fold the cardstock on each of the scored lines. Place adhesive on the four individual tabs to create the rectangle little box (see below).
Now that the base of the handbag is made, it is now time to add the sides to it. Adhere the two edges of the 6″ pieces of Designer Series Paper (DSP) together (this will make a 6″ x 19″ piece of paper. Adhere the DSP to the handbag base (for my bag I left a little bit of the red cardstock showing, but you can cover the whole base with the DSP if you would like to). You are literally just wrapping the DSP around the base of the handbag (no scoring is required). After the sides of the handbag is attached, it is time to make the handles. To make the handles, I used a corner rounder on all four corners of the 1″ x 11″ strips of cardstock. Then, I scored the 1″ x 11″ piece of cardstock at .5″ (I left two inches on each end of the pieces that I did not score because they will be attached to the sides of the handbag).
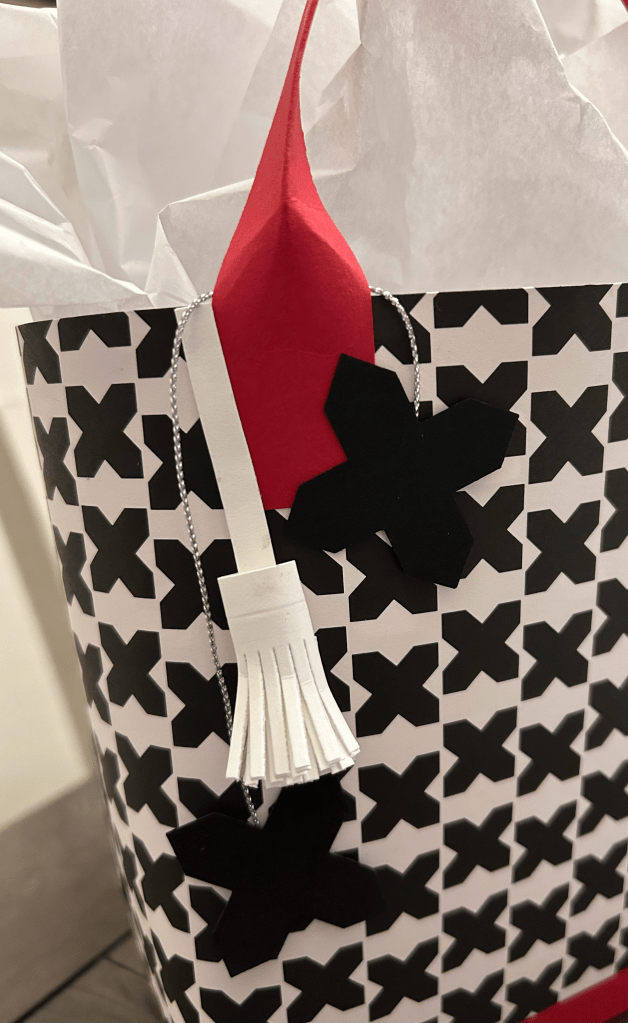
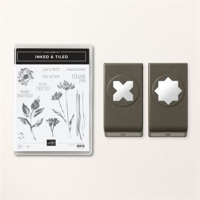
Now that the handbag is made, it is time to decorate it. I decided to add the Basic Black shapes to the bag that matched the Designer Series Paper (DSP). I used the Inked & Tiled Punch Pack to punch out the two shapes and I connected them together using the Simply Elegant Trim. I also wanted to add some more pizzaz to the handbag by adding a tassel to it. I used the Beautiful Balloons Dies to create the tassel.
Below is a list of the Stampin’ Up supplies I used to create this fancy handbag. Happy stamping! 🙂
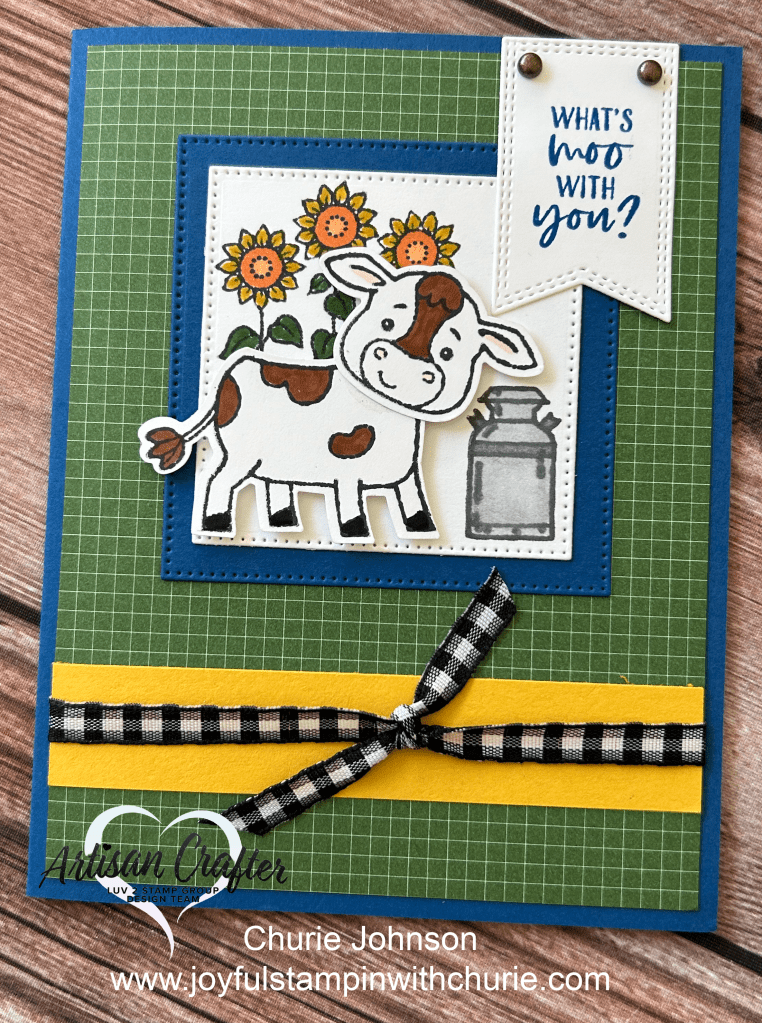
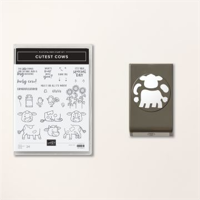
This little cow is the cutest. 🙂 I made this card using the Stampin Up Cutest Cow bundle and paired it with the Sweet Thoughts Memories and More Card Pack. I stamped the sunflowers and milk jug images onto the Basic White Cardstock and colored them using the Stampin Blends and markers. Next, I stamped the cow images onto Basic White Cardstock and colored them using the Pecan Pie Stampin Blends. I adhered the cute cow to the card using Stampin Dimensionals. After creating the main scene, I stamped the sentiment onto the banner using the Blueberry Bushel Classic Stampin Pad. To add some pizzaz to the card, I placed two Rustic Metallic Adhesive-backed dots to the banner and tied some Black and White Gingham Ribbon onto the card.
Sweet Thoughts Memories and More Card layer: 5.25″ x 4″
Blueberry Bushel layer: Stylish Shapes Dies (2.75″ square)
Basic White Square: Stylish Shapes Dies (2.5″ square)
Basic White Banner: Nestled Essential Dies
Crushed Curry layer: .75″ x 4″
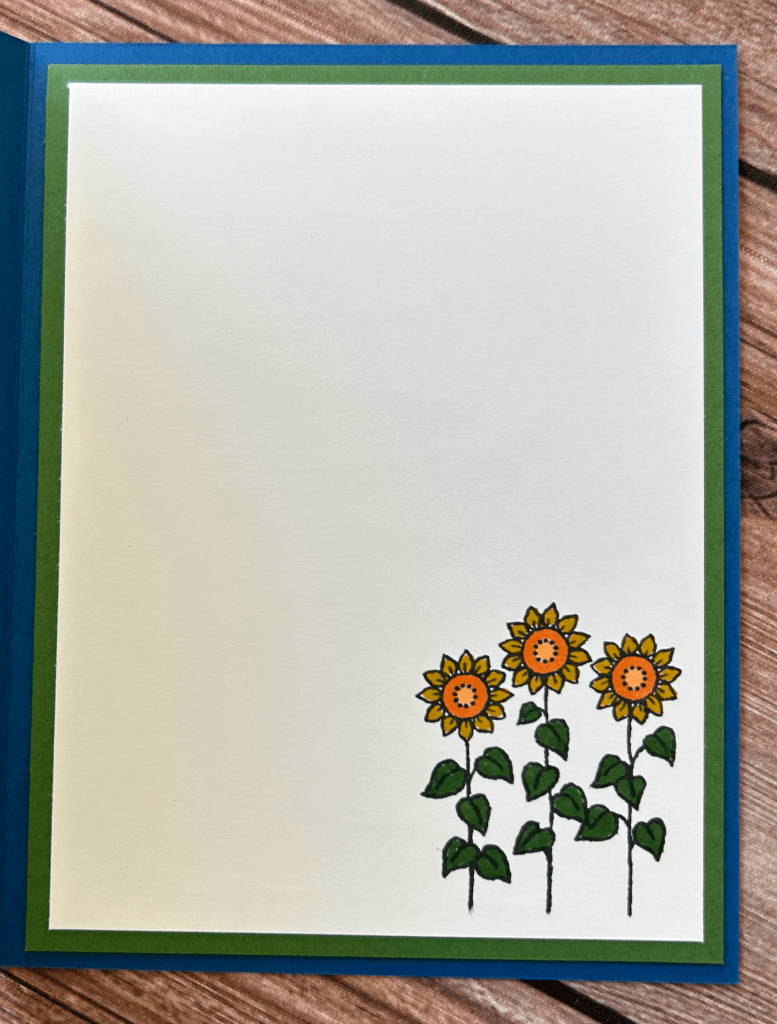
I stamped the sunflowers inside of the card and colored them using the Stampin Blends and markers. The Garden Green layer is 5.25″ x 4″. The Basic White layer is 5″ x 3.75″.
If you’d like to create this card, the list of supplies I used to make it is below. Happy stamping! 🙂