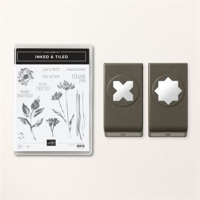
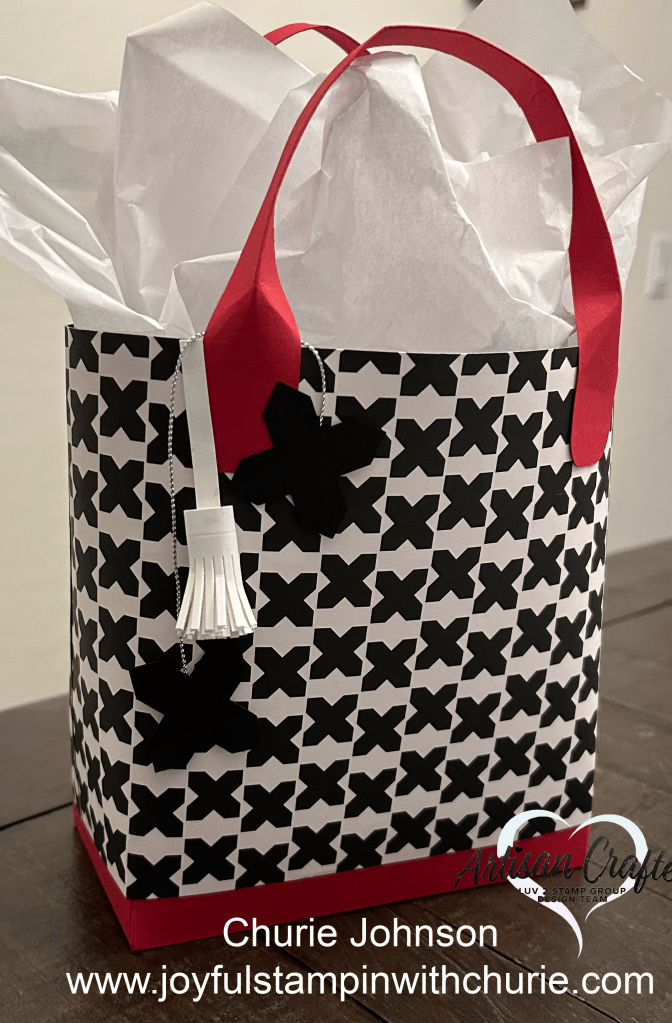
I created this fabulous handbag using three Stampin’ Up retiring products: Delightfully Eclectic 12″ x 12″ Designer Series Paper (DSP), Inked & Tiled Punch Pack, and Beautiful Balloons Dies. If you would like to create this handbag, it is not too late to get these retiring products that will not be available after April 30th or while supplies last (which ever is soonest).
Color Combination:
Handbag Measurements:
Cardstock: 5” x 8” (base of the handbag)
2 pieces of Designer Series Paper: 12” x 6” and 7” x 6” (sides of handbag)
2 pieces of cardstock: 1” x 11” (handles for the handbag)
Cardstock: 1.5” x 8” (optional tassel)
Instructions:
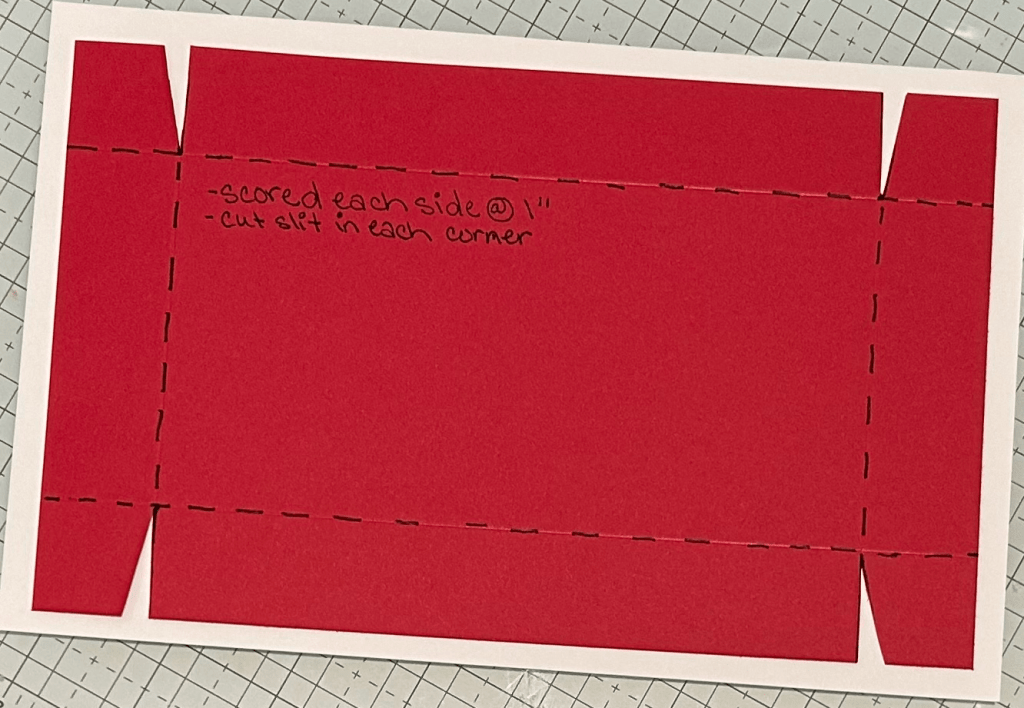
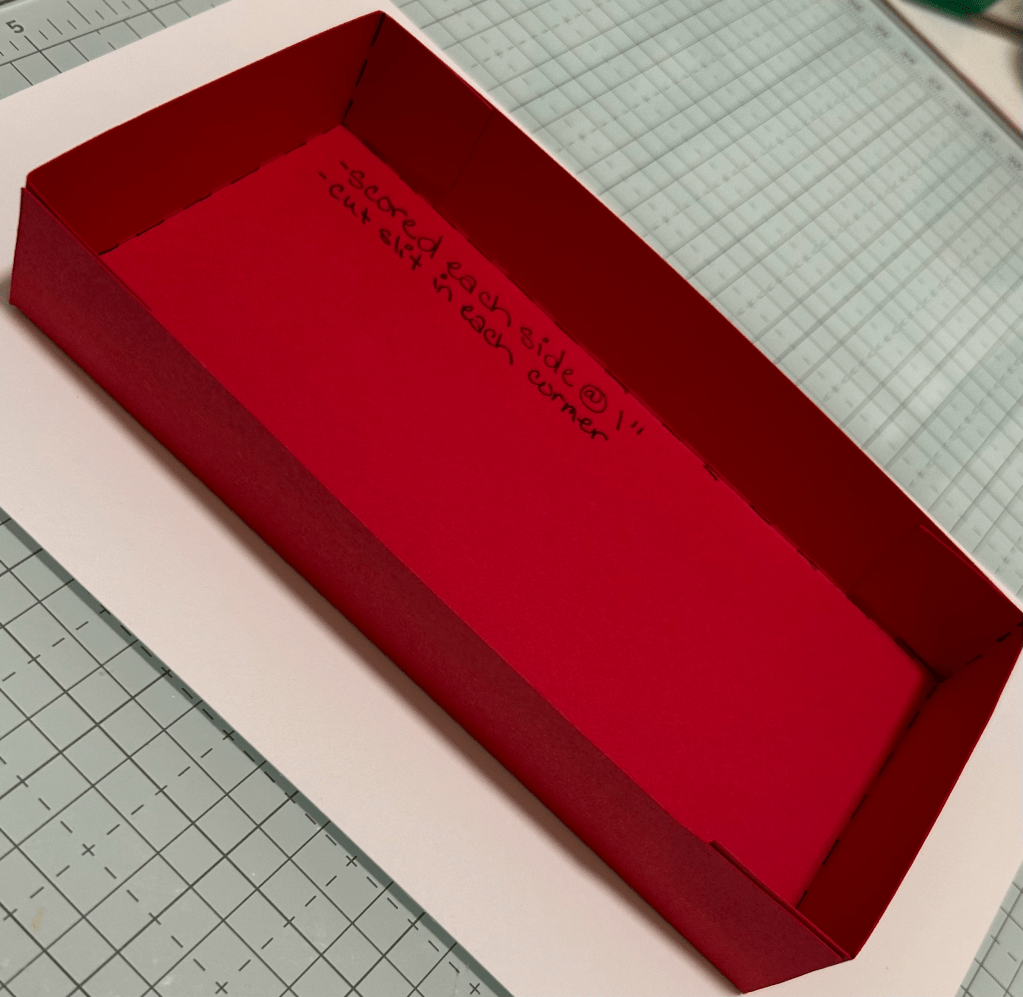
To create the base of the handbag, take the 5″ x 8″ piece of cardstock and score it 1″ on every side. Next, cut a little slot out from each corner as shown in the picture above. After the little slots are cut out, fold the cardstock on each of the scored lines. Place adhesive on the four individual tabs to create the rectangle little box (see below).
Now that the base of the handbag is made, it is now time to add the sides to it. Adhere the two edges of the 6″ pieces of Designer Series Paper (DSP) together (this will make a 6″ x 19″ piece of paper. Adhere the DSP to the handbag base (for my bag I left a little bit of the red cardstock showing, but you can cover the whole base with the DSP if you would like to). You are literally just wrapping the DSP around the base of the handbag (no scoring is required). After the sides of the handbag is attached, it is time to make the handles. To make the handles, I used a corner rounder on all four corners of the 1″ x 11″ strips of cardstock. Then, I scored the 1″ x 11″ piece of cardstock at .5″ (I left two inches on each end of the pieces that I did not score because they will be attached to the sides of the handbag).
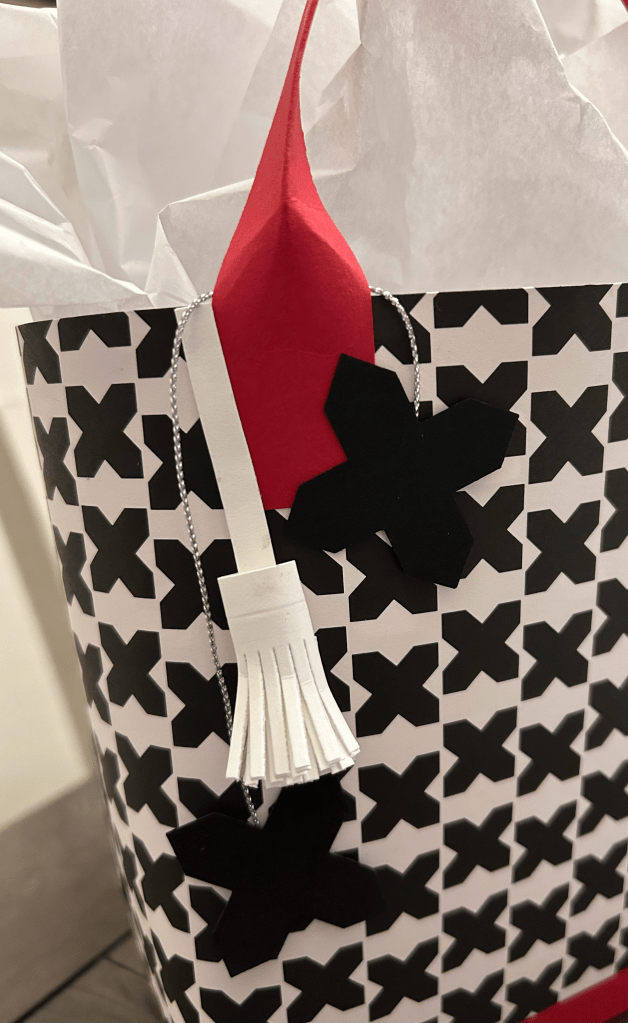
Now that the handbag is made, it is time to decorate it. I decided to add the Basic Black shapes to the bag that matched the Designer Series Paper (DSP). I used the Inked & Tiled Punch Pack to punch out the two shapes and I connected them together using the Simply Elegant Trim. I also wanted to add some more pizzaz to the handbag by adding a tassel to it. I used the Beautiful Balloons Dies to create the tassel.
Below is a list of the Stampin’ Up supplies I used to create this fancy handbag. Happy stamping! 🙂